December Recap

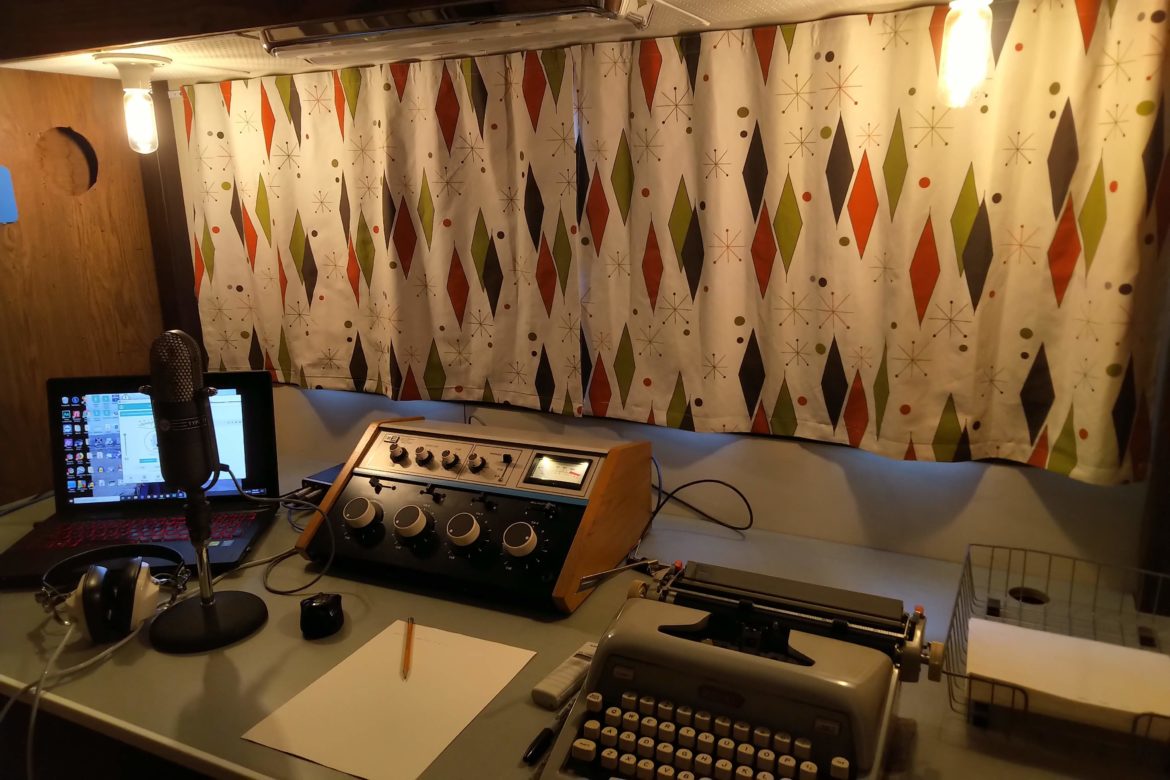
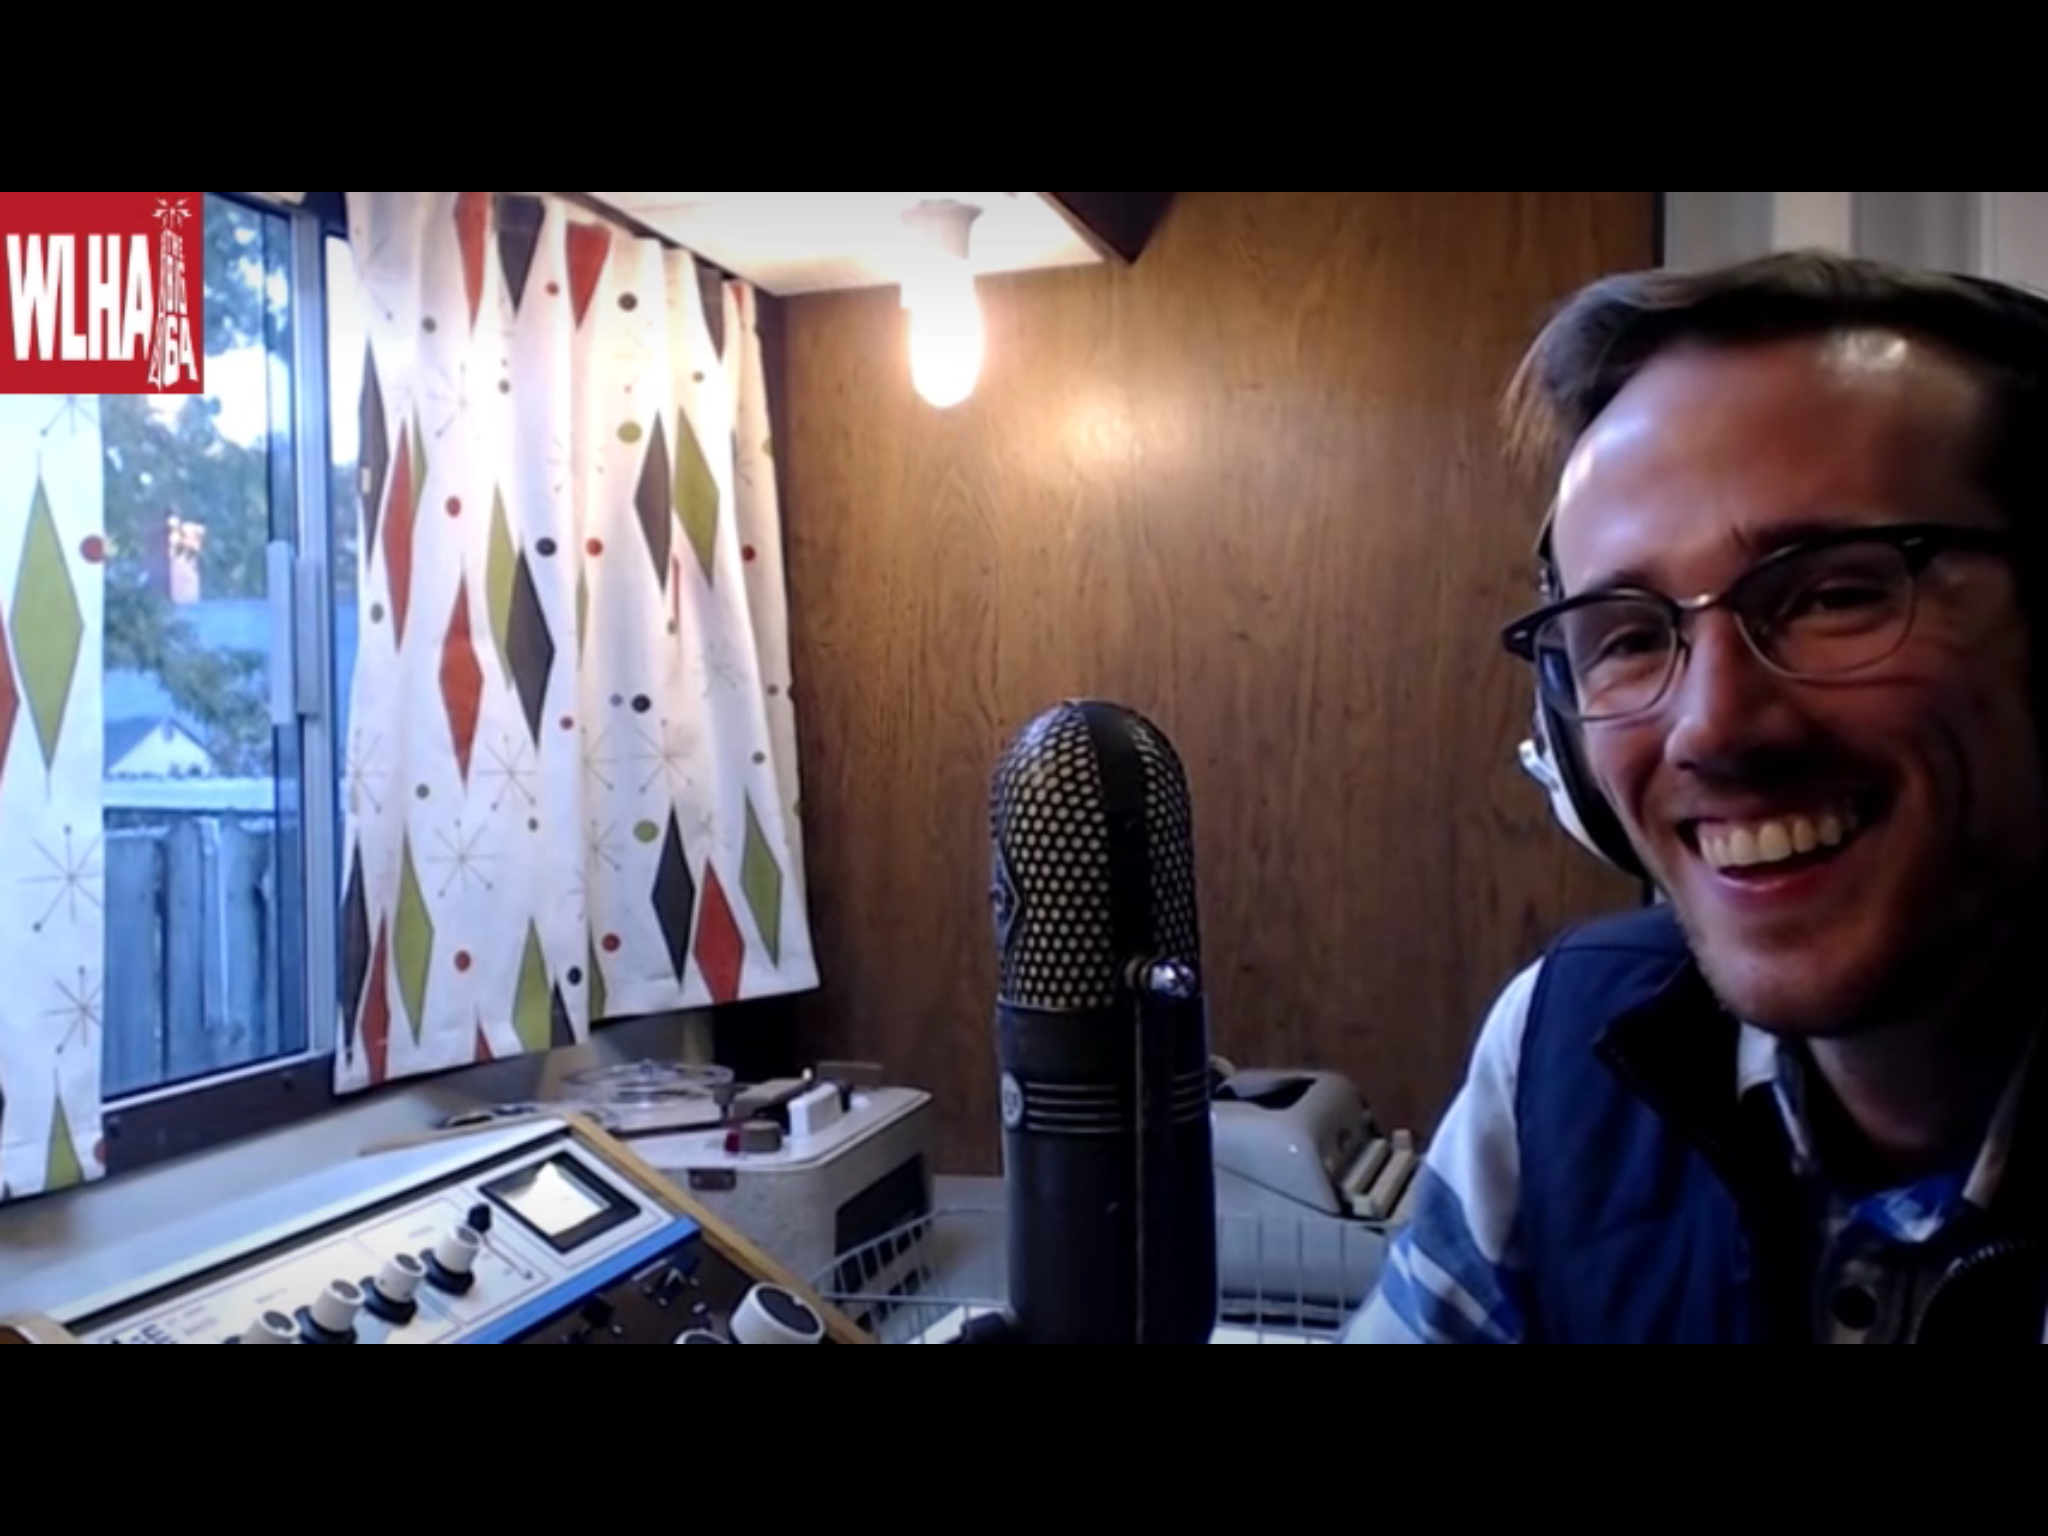
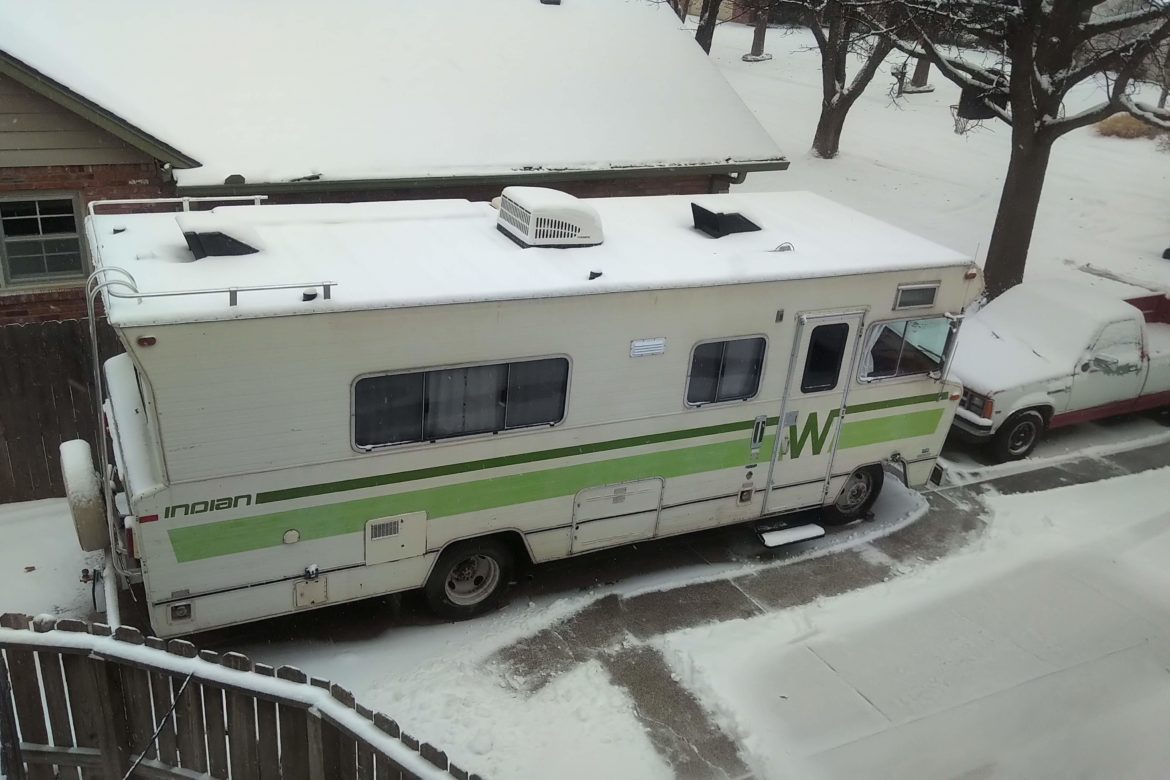
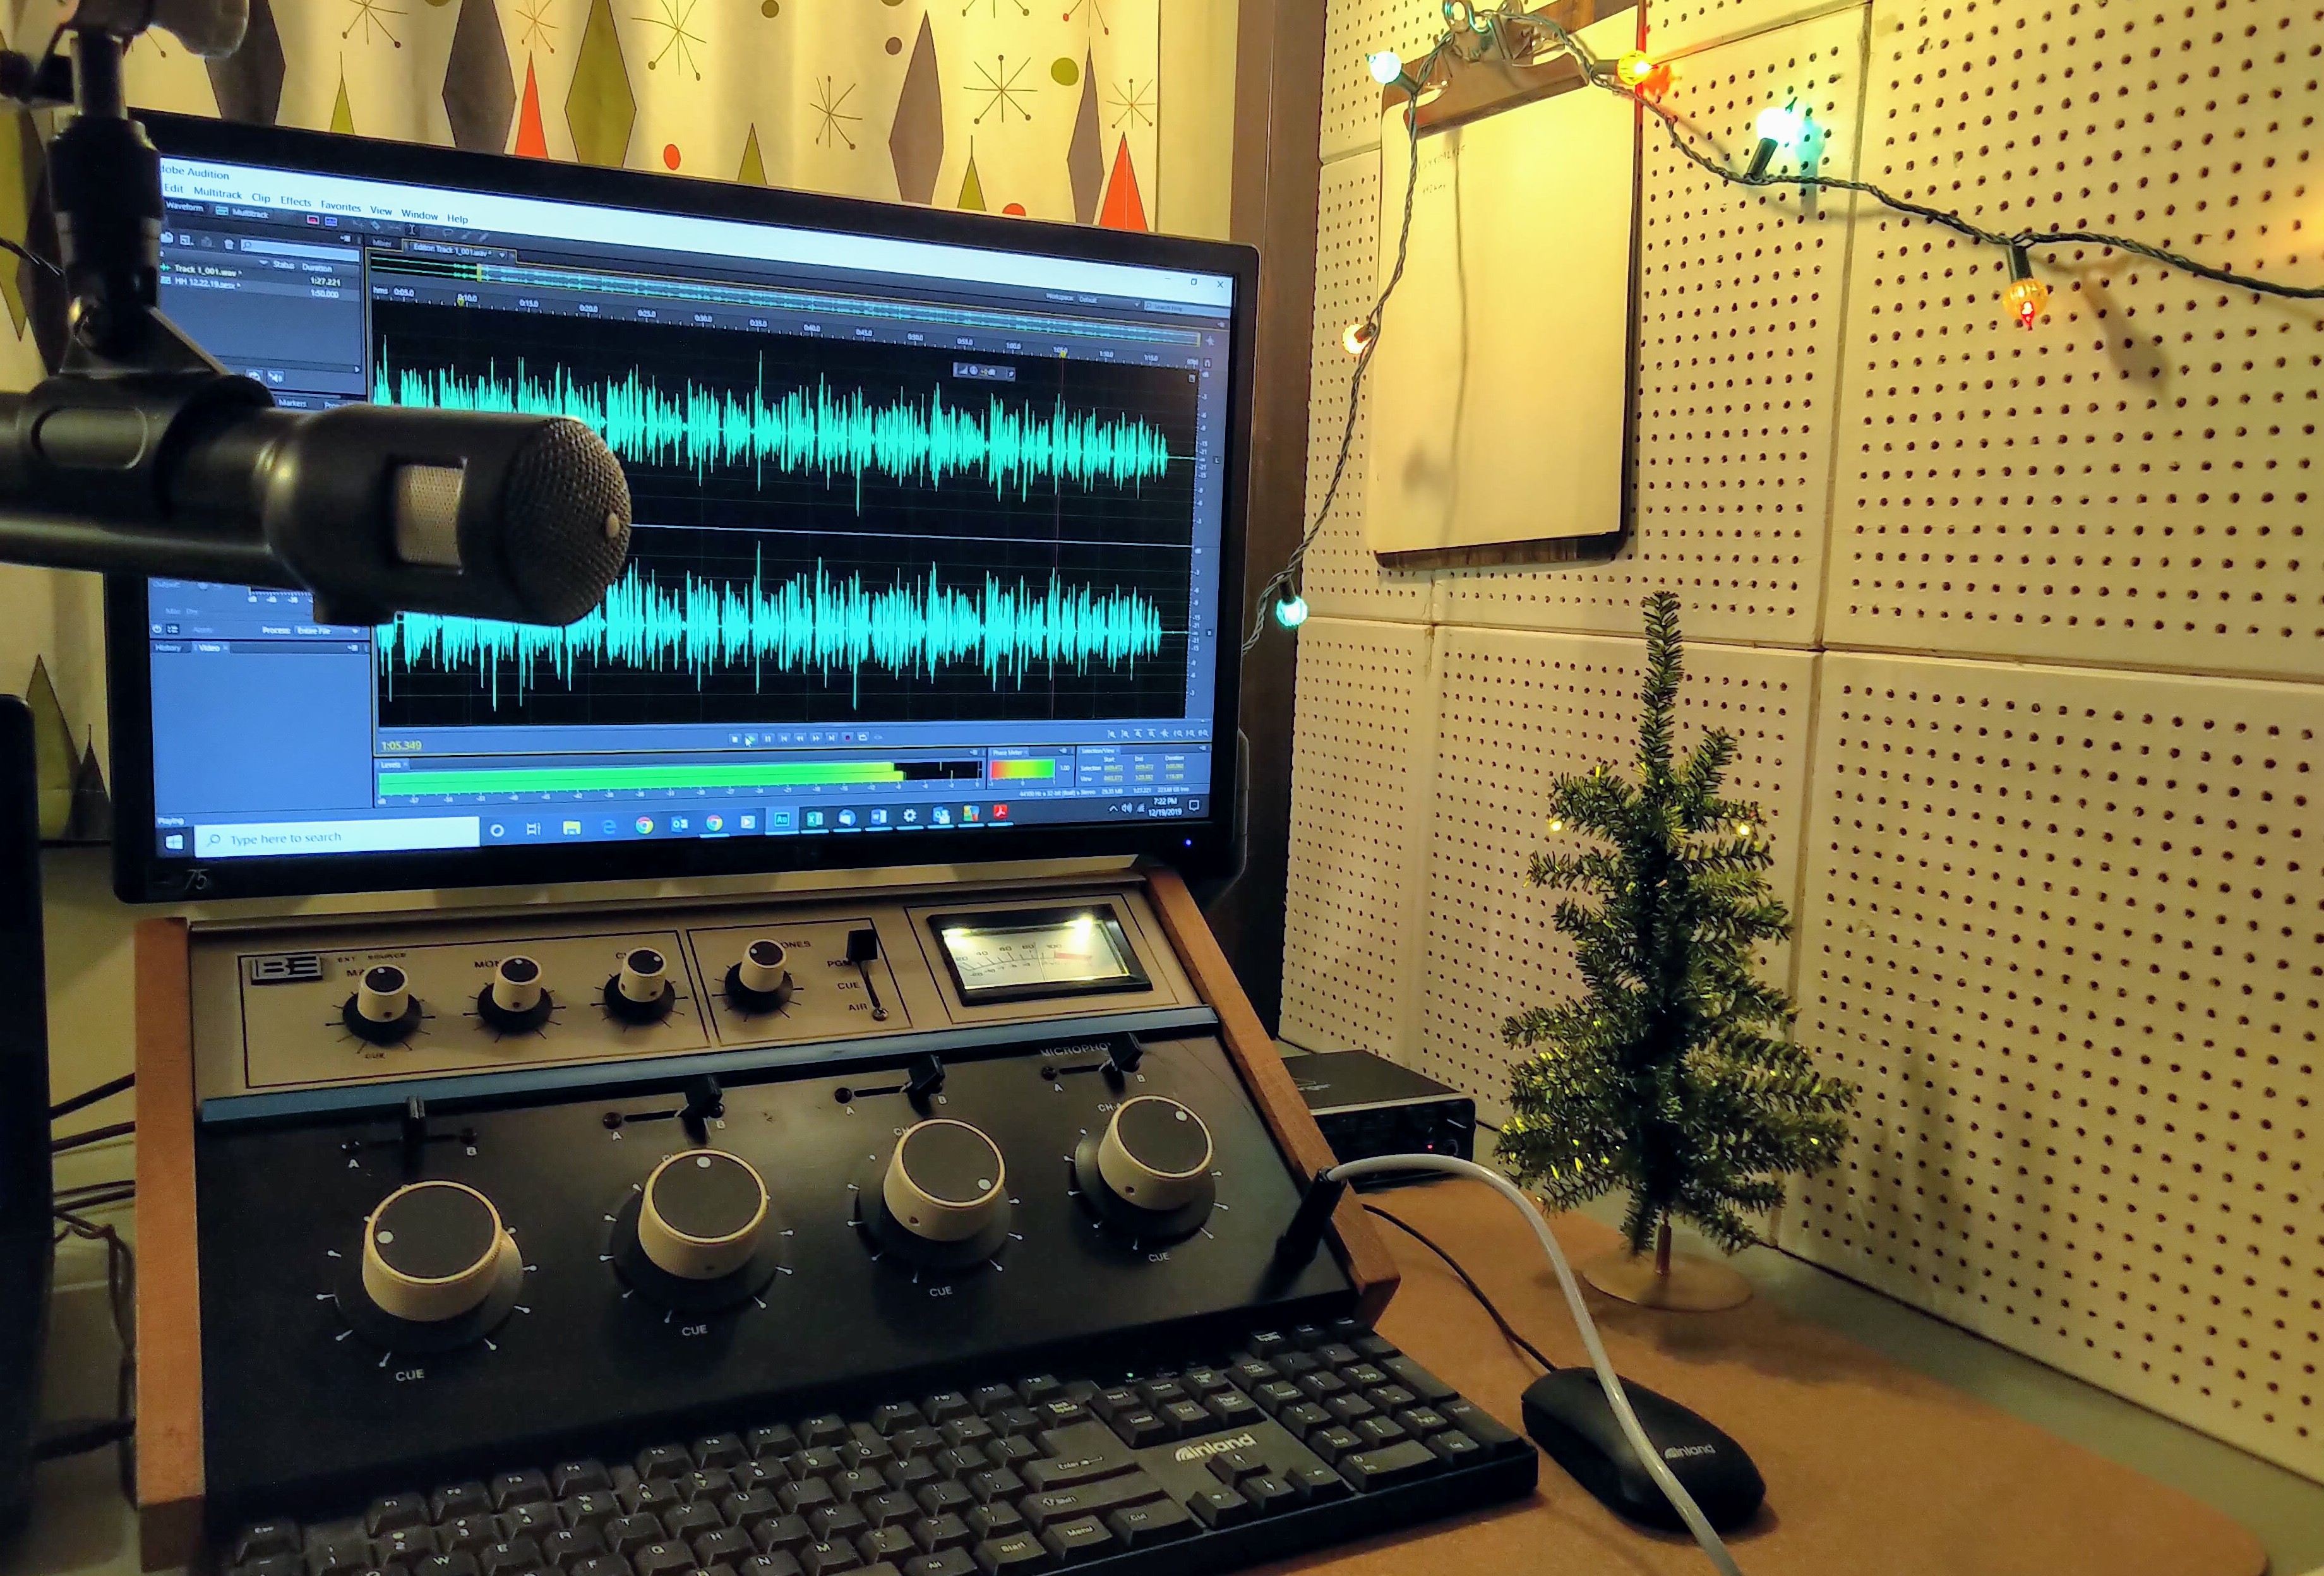
Progress continues on the Winnebago restoration, although obvious holiday distractions and the cold weather have slowed things down a bit.  The good news is the RV is in use daily for a variety of tasks including audio production.  The acoustics in the studio area have turned out great.  Since this is a recap, I’ll briefly list some of the recent restoration news:

  • The source of shimmying noted in previous posts was discovered to be the driver’s side front rim which was probably built wrong from day one.  Since all the rims on the vehicle are the same (and rather rare 17.5″ ones at that), the spare tire rim was substituted.  Long story short, that rim had a leak through one of the rivets and had to be epoxied.  Good news is, it was a inexpensive fix and we’re rolling great with no leaks!
  • The entry door has been rebuilt and put back on the frame, although it will have to come off again when we reconstruct the wood underneath the door that has rotted away.  Look for a post on that soon.
  • All six curtains are finished and installed! Again, I’ll have a post on that upcoming.
  • Installation has started on the ham and CB radios to go in the vehicle, accessible from the driving area.
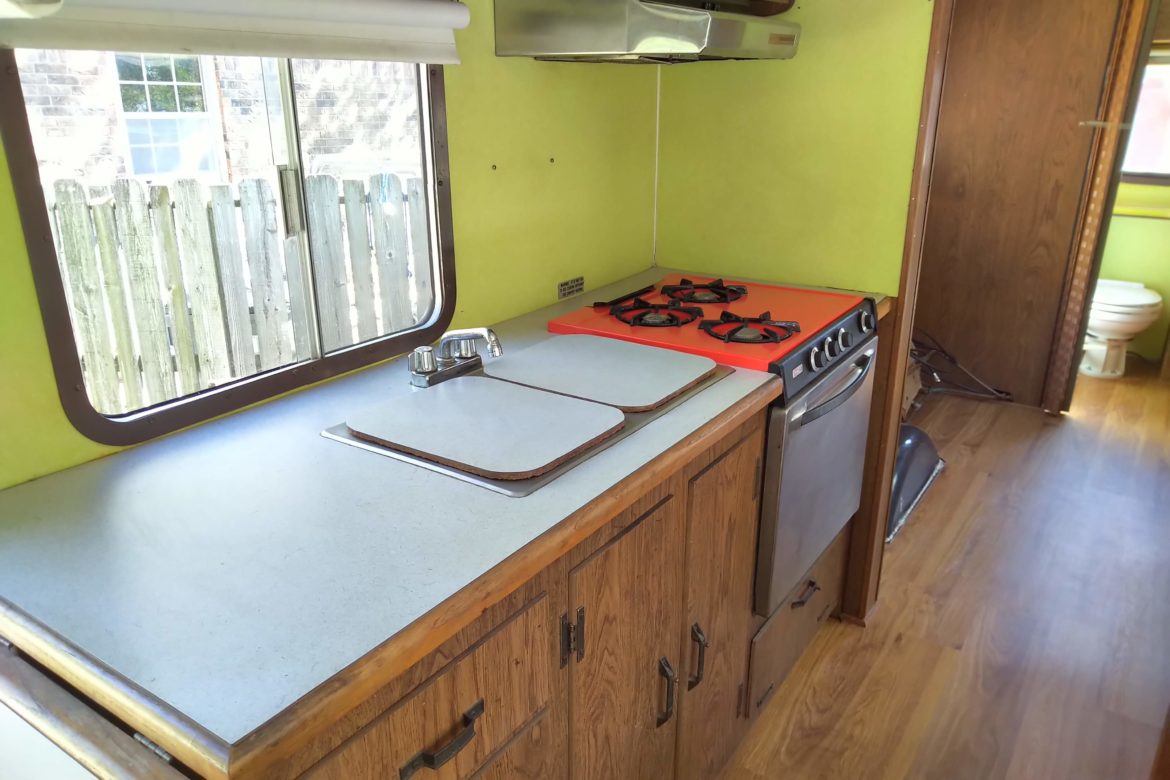
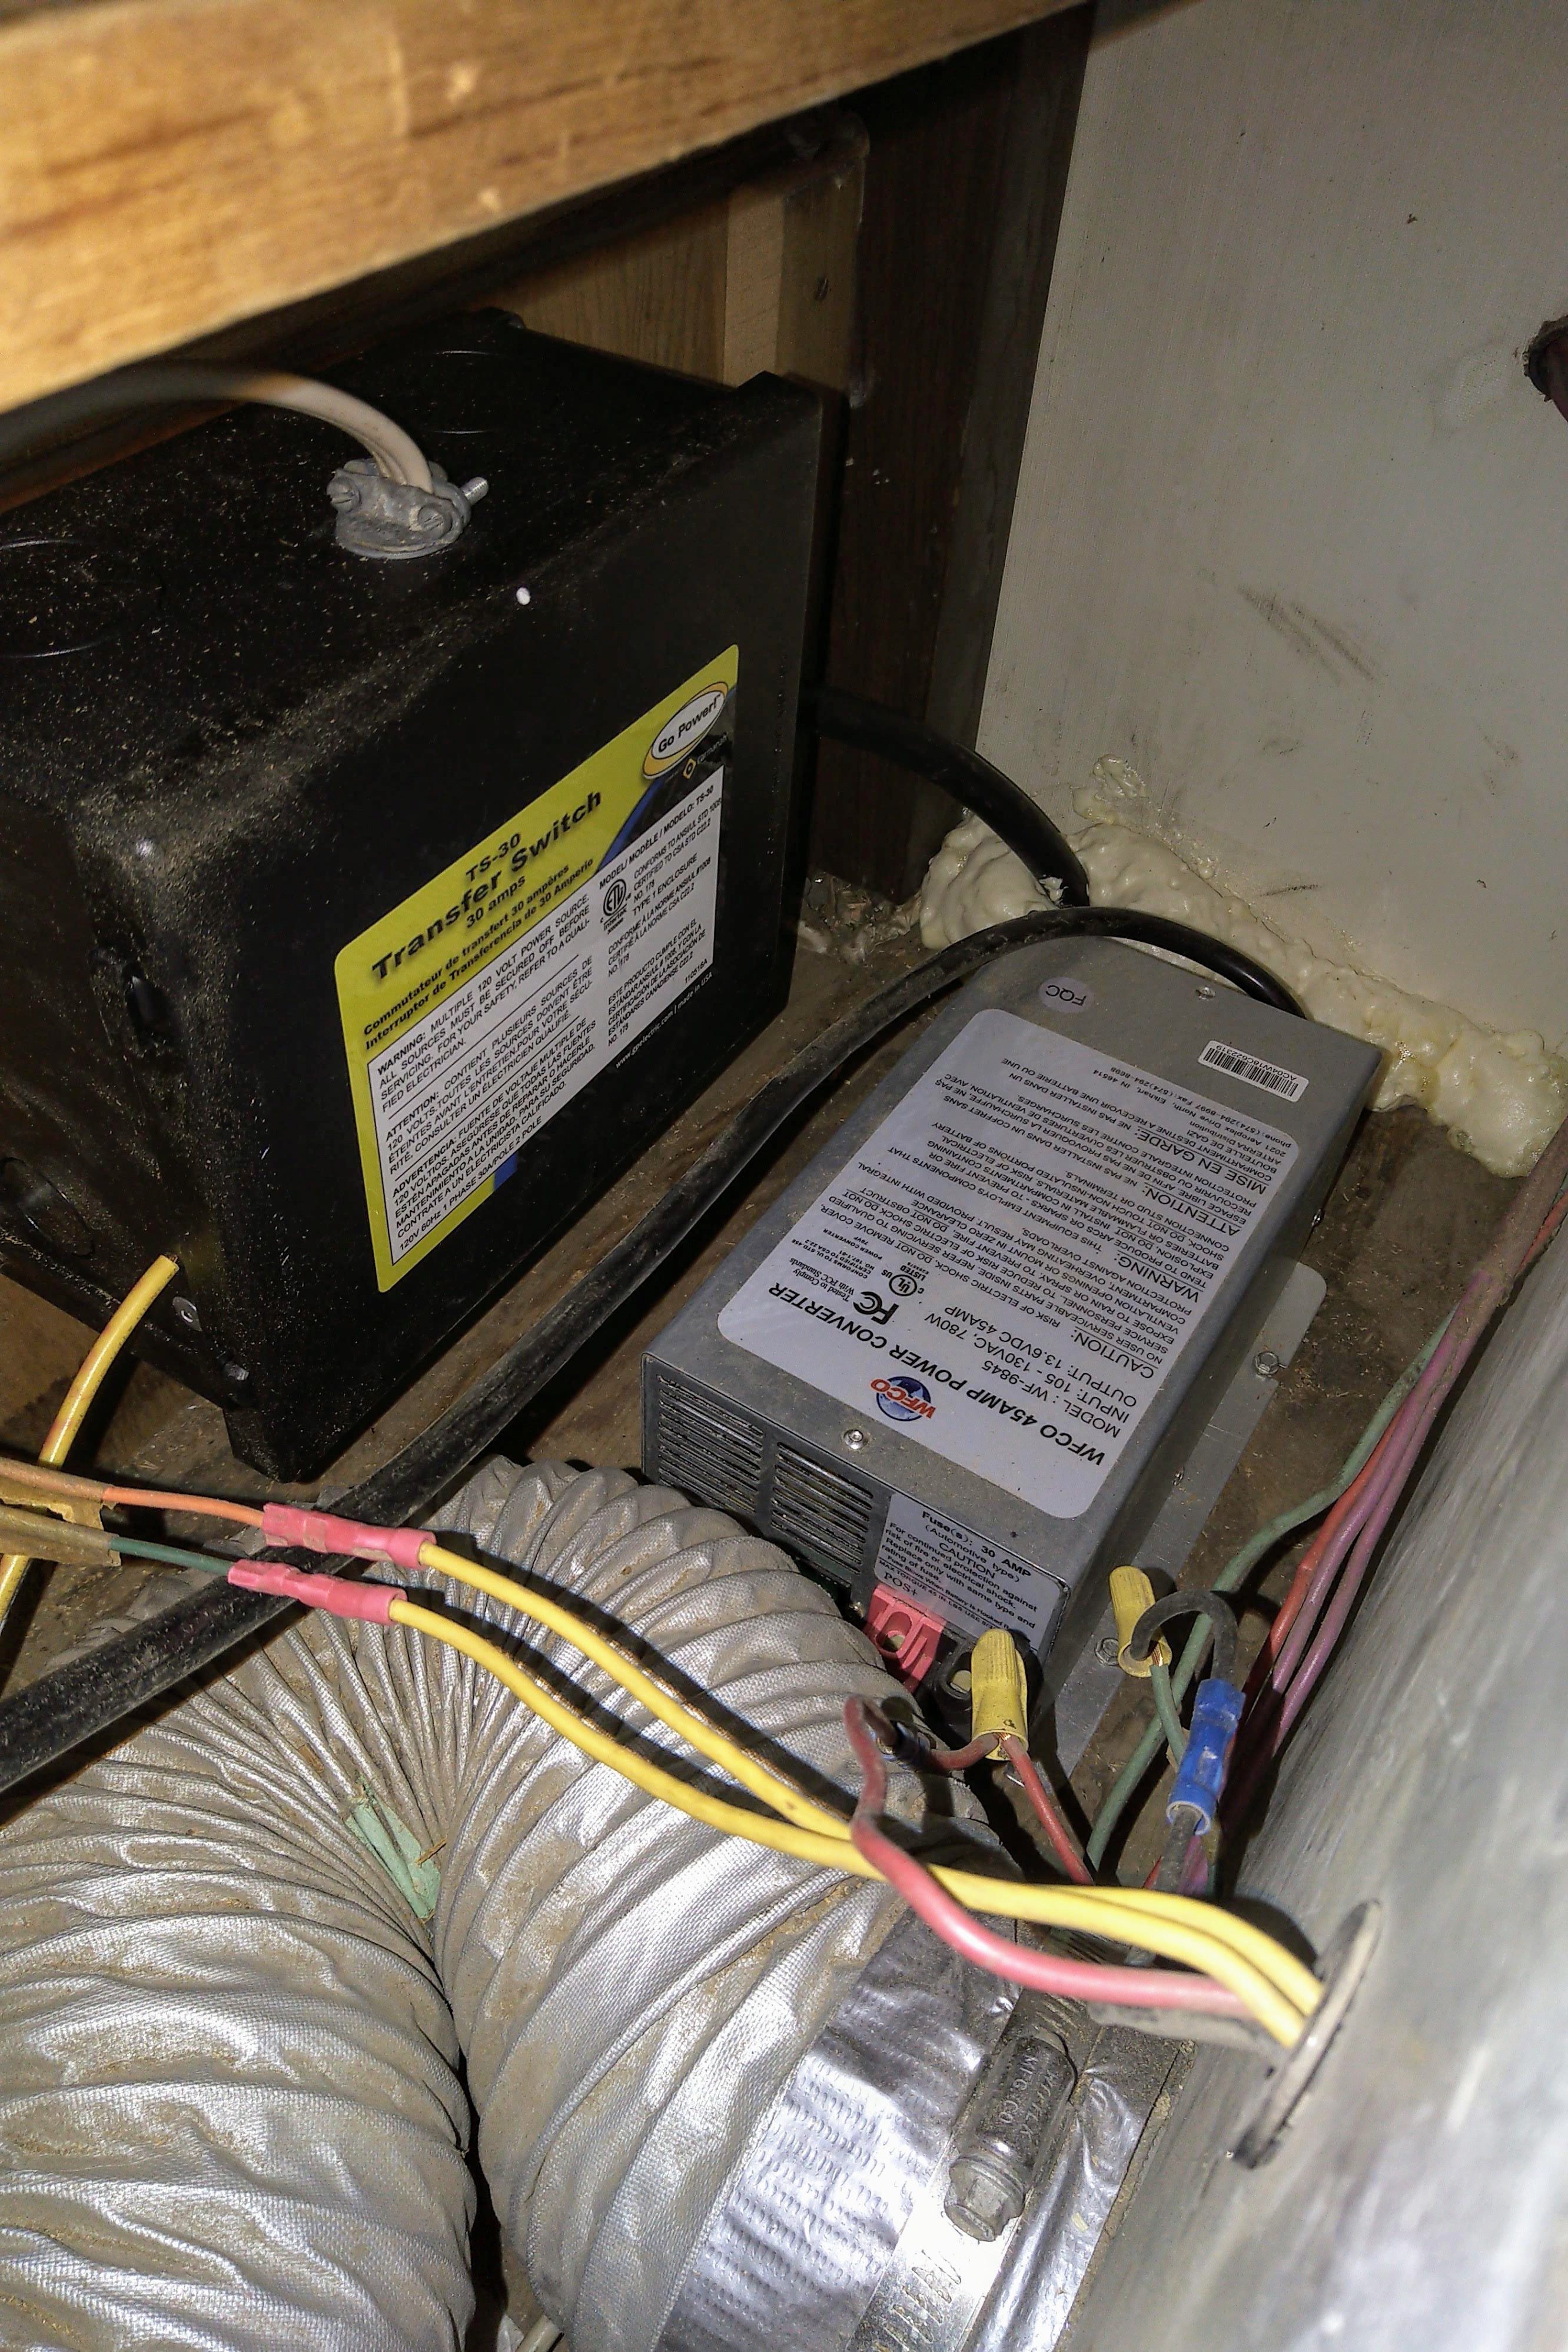
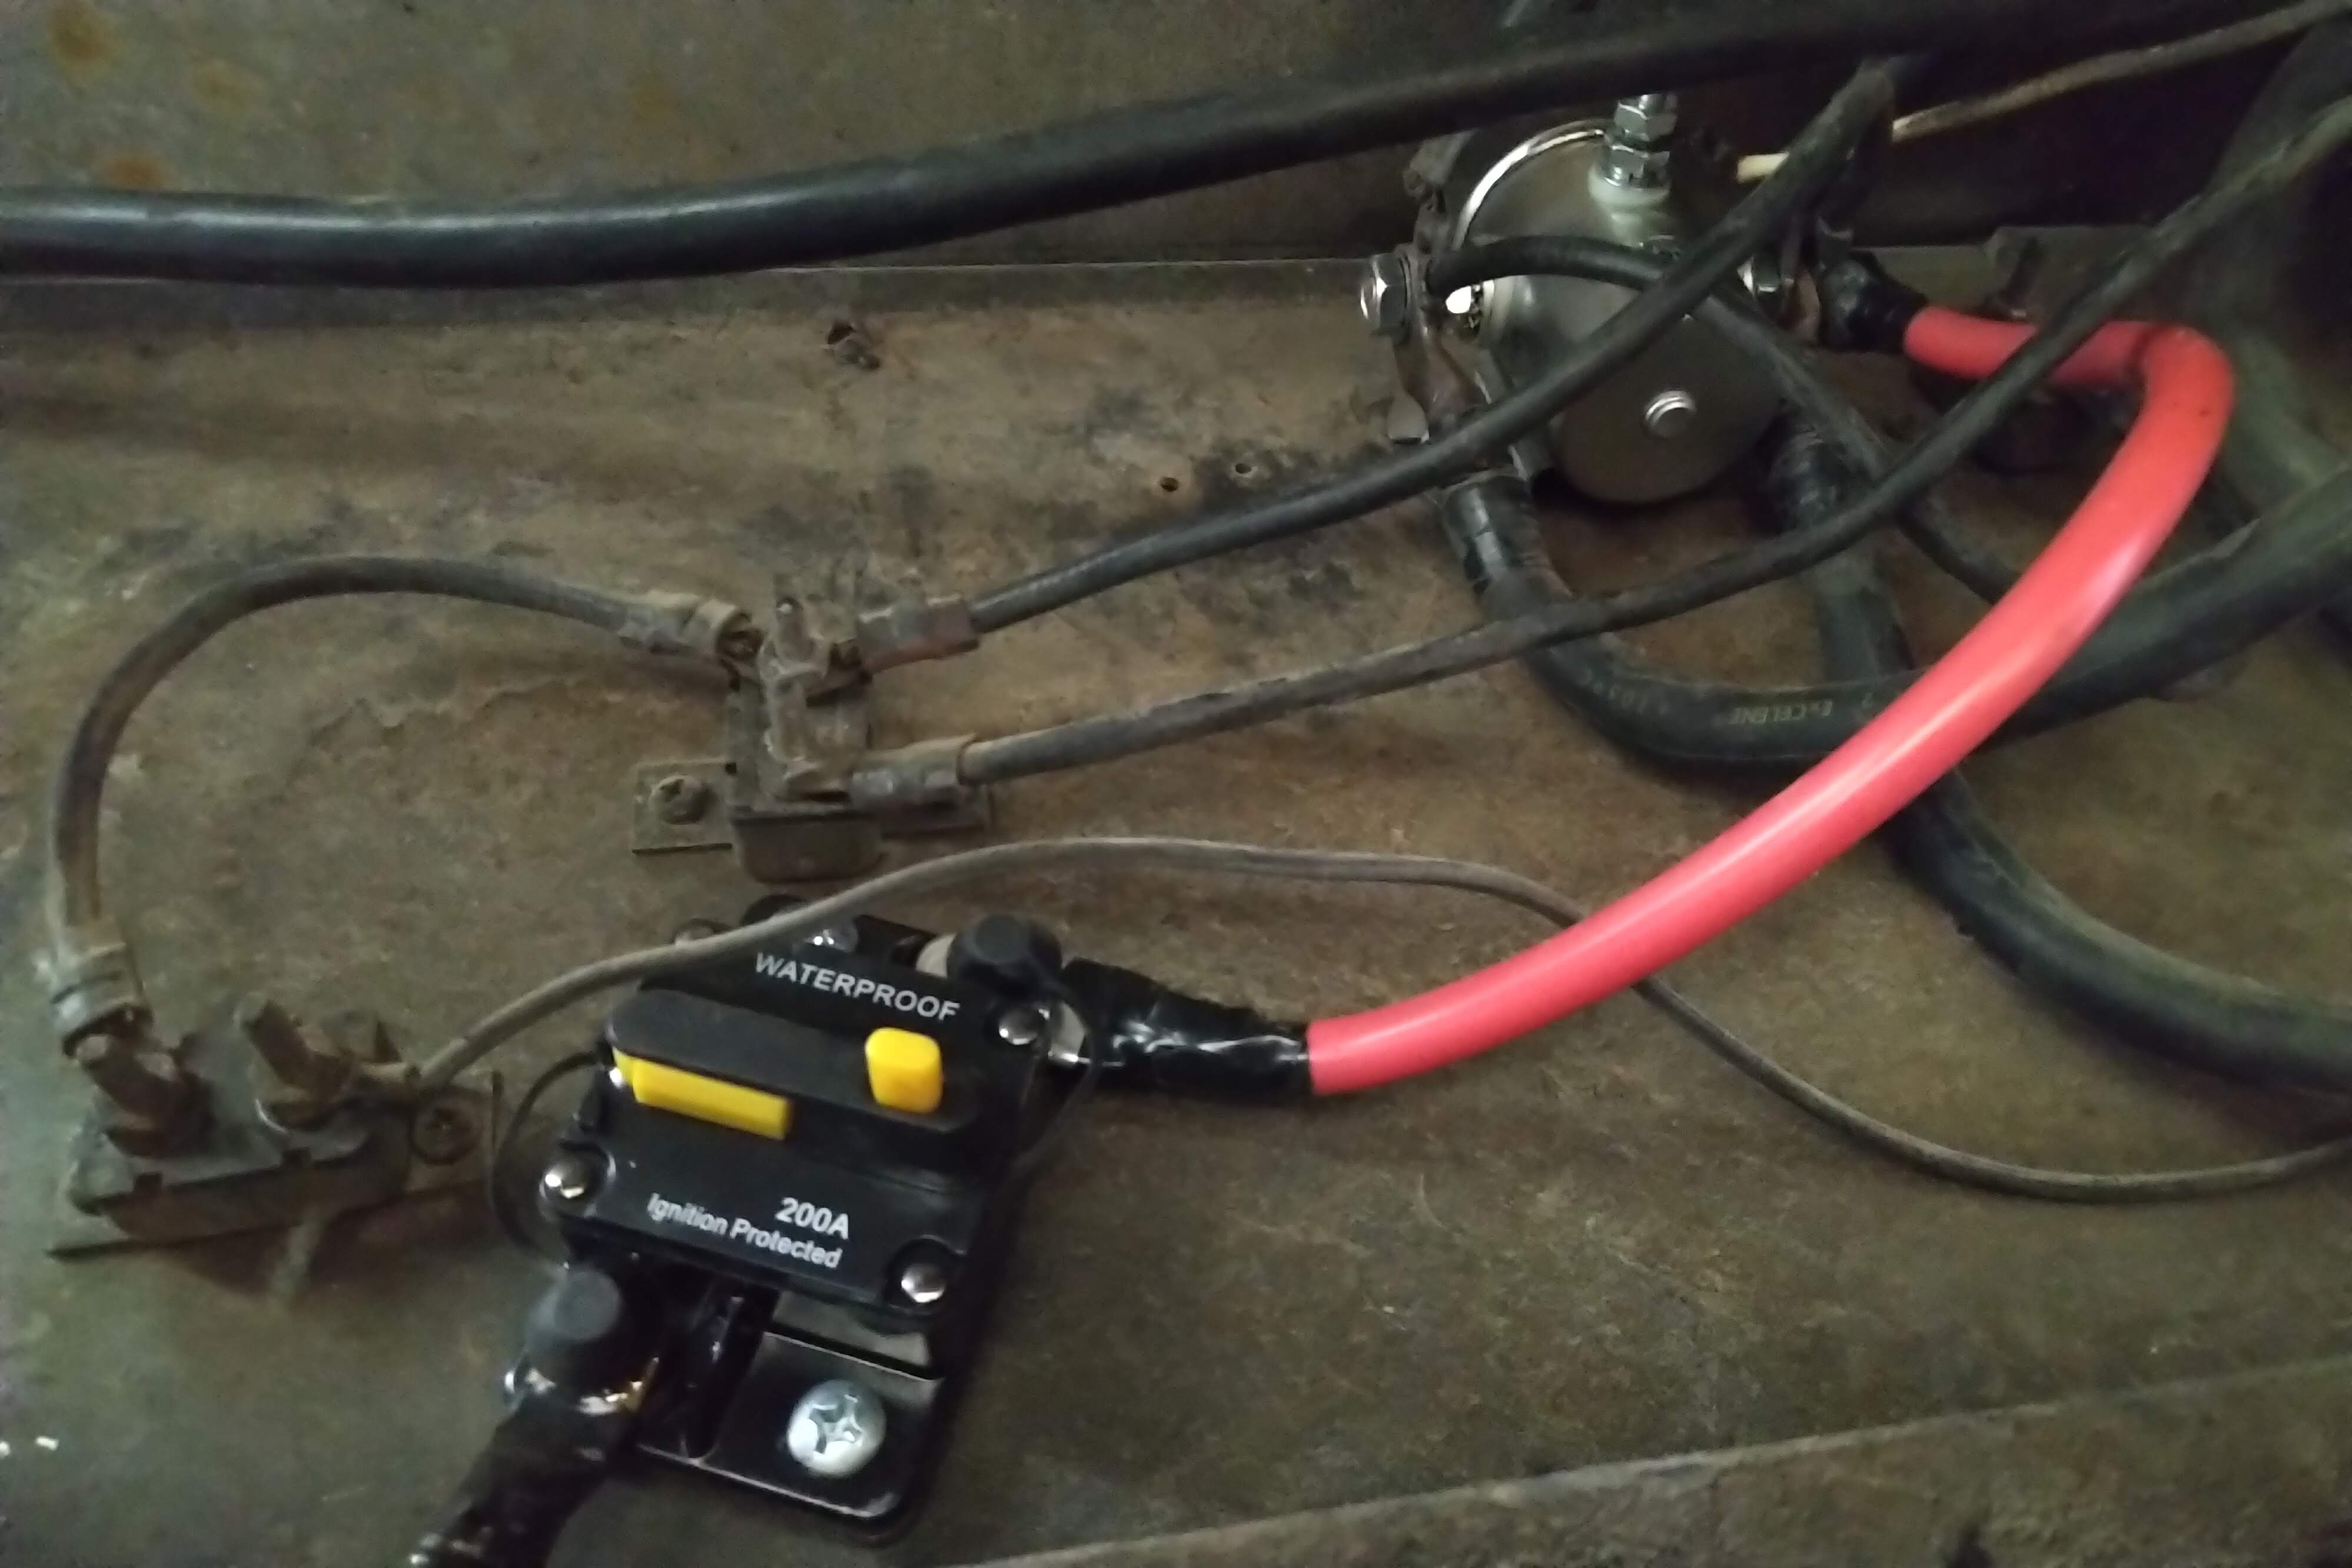
  • Most of the electrical upgrades have been completed (I think).  An extra outlet under the couch was added to power some heat tape.  While the water is not running right now, existing and new heat tape is keeping the lines and water pump from freezing, just in case.
  • A 30 amp electrical outlet has been added to provide full electrical service to the RV.  I could even run the air conditioner right now if I wanted…
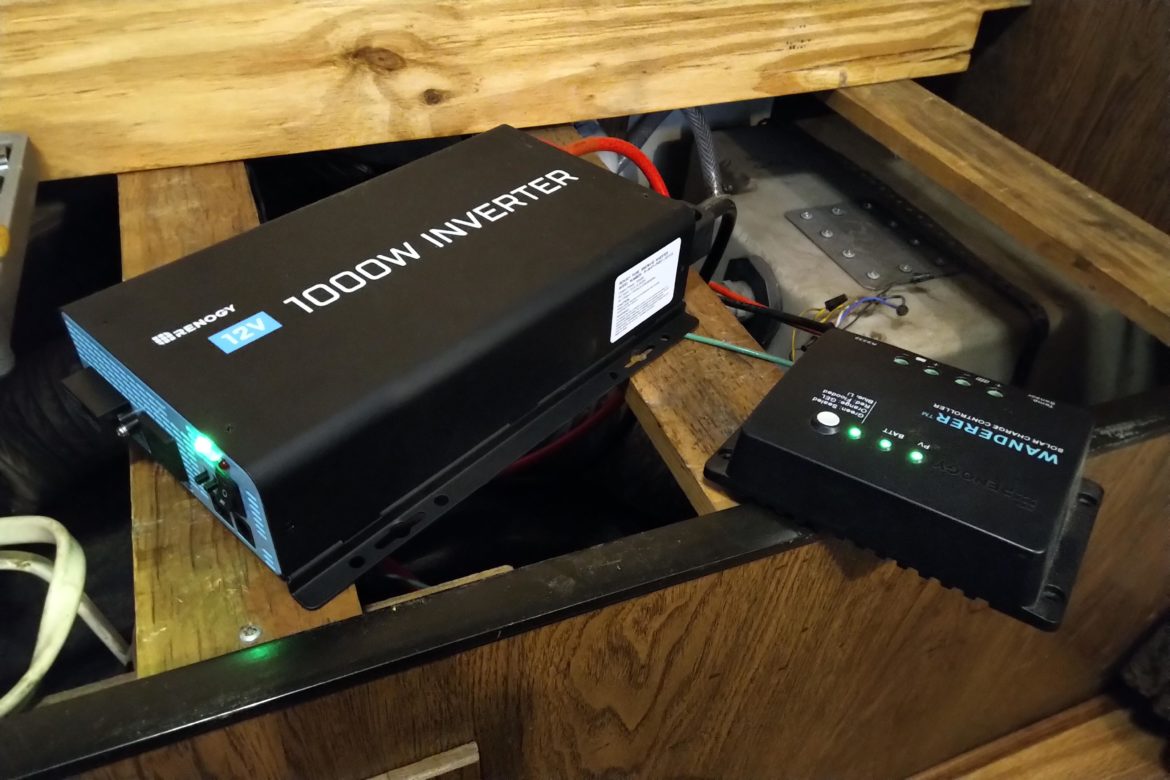
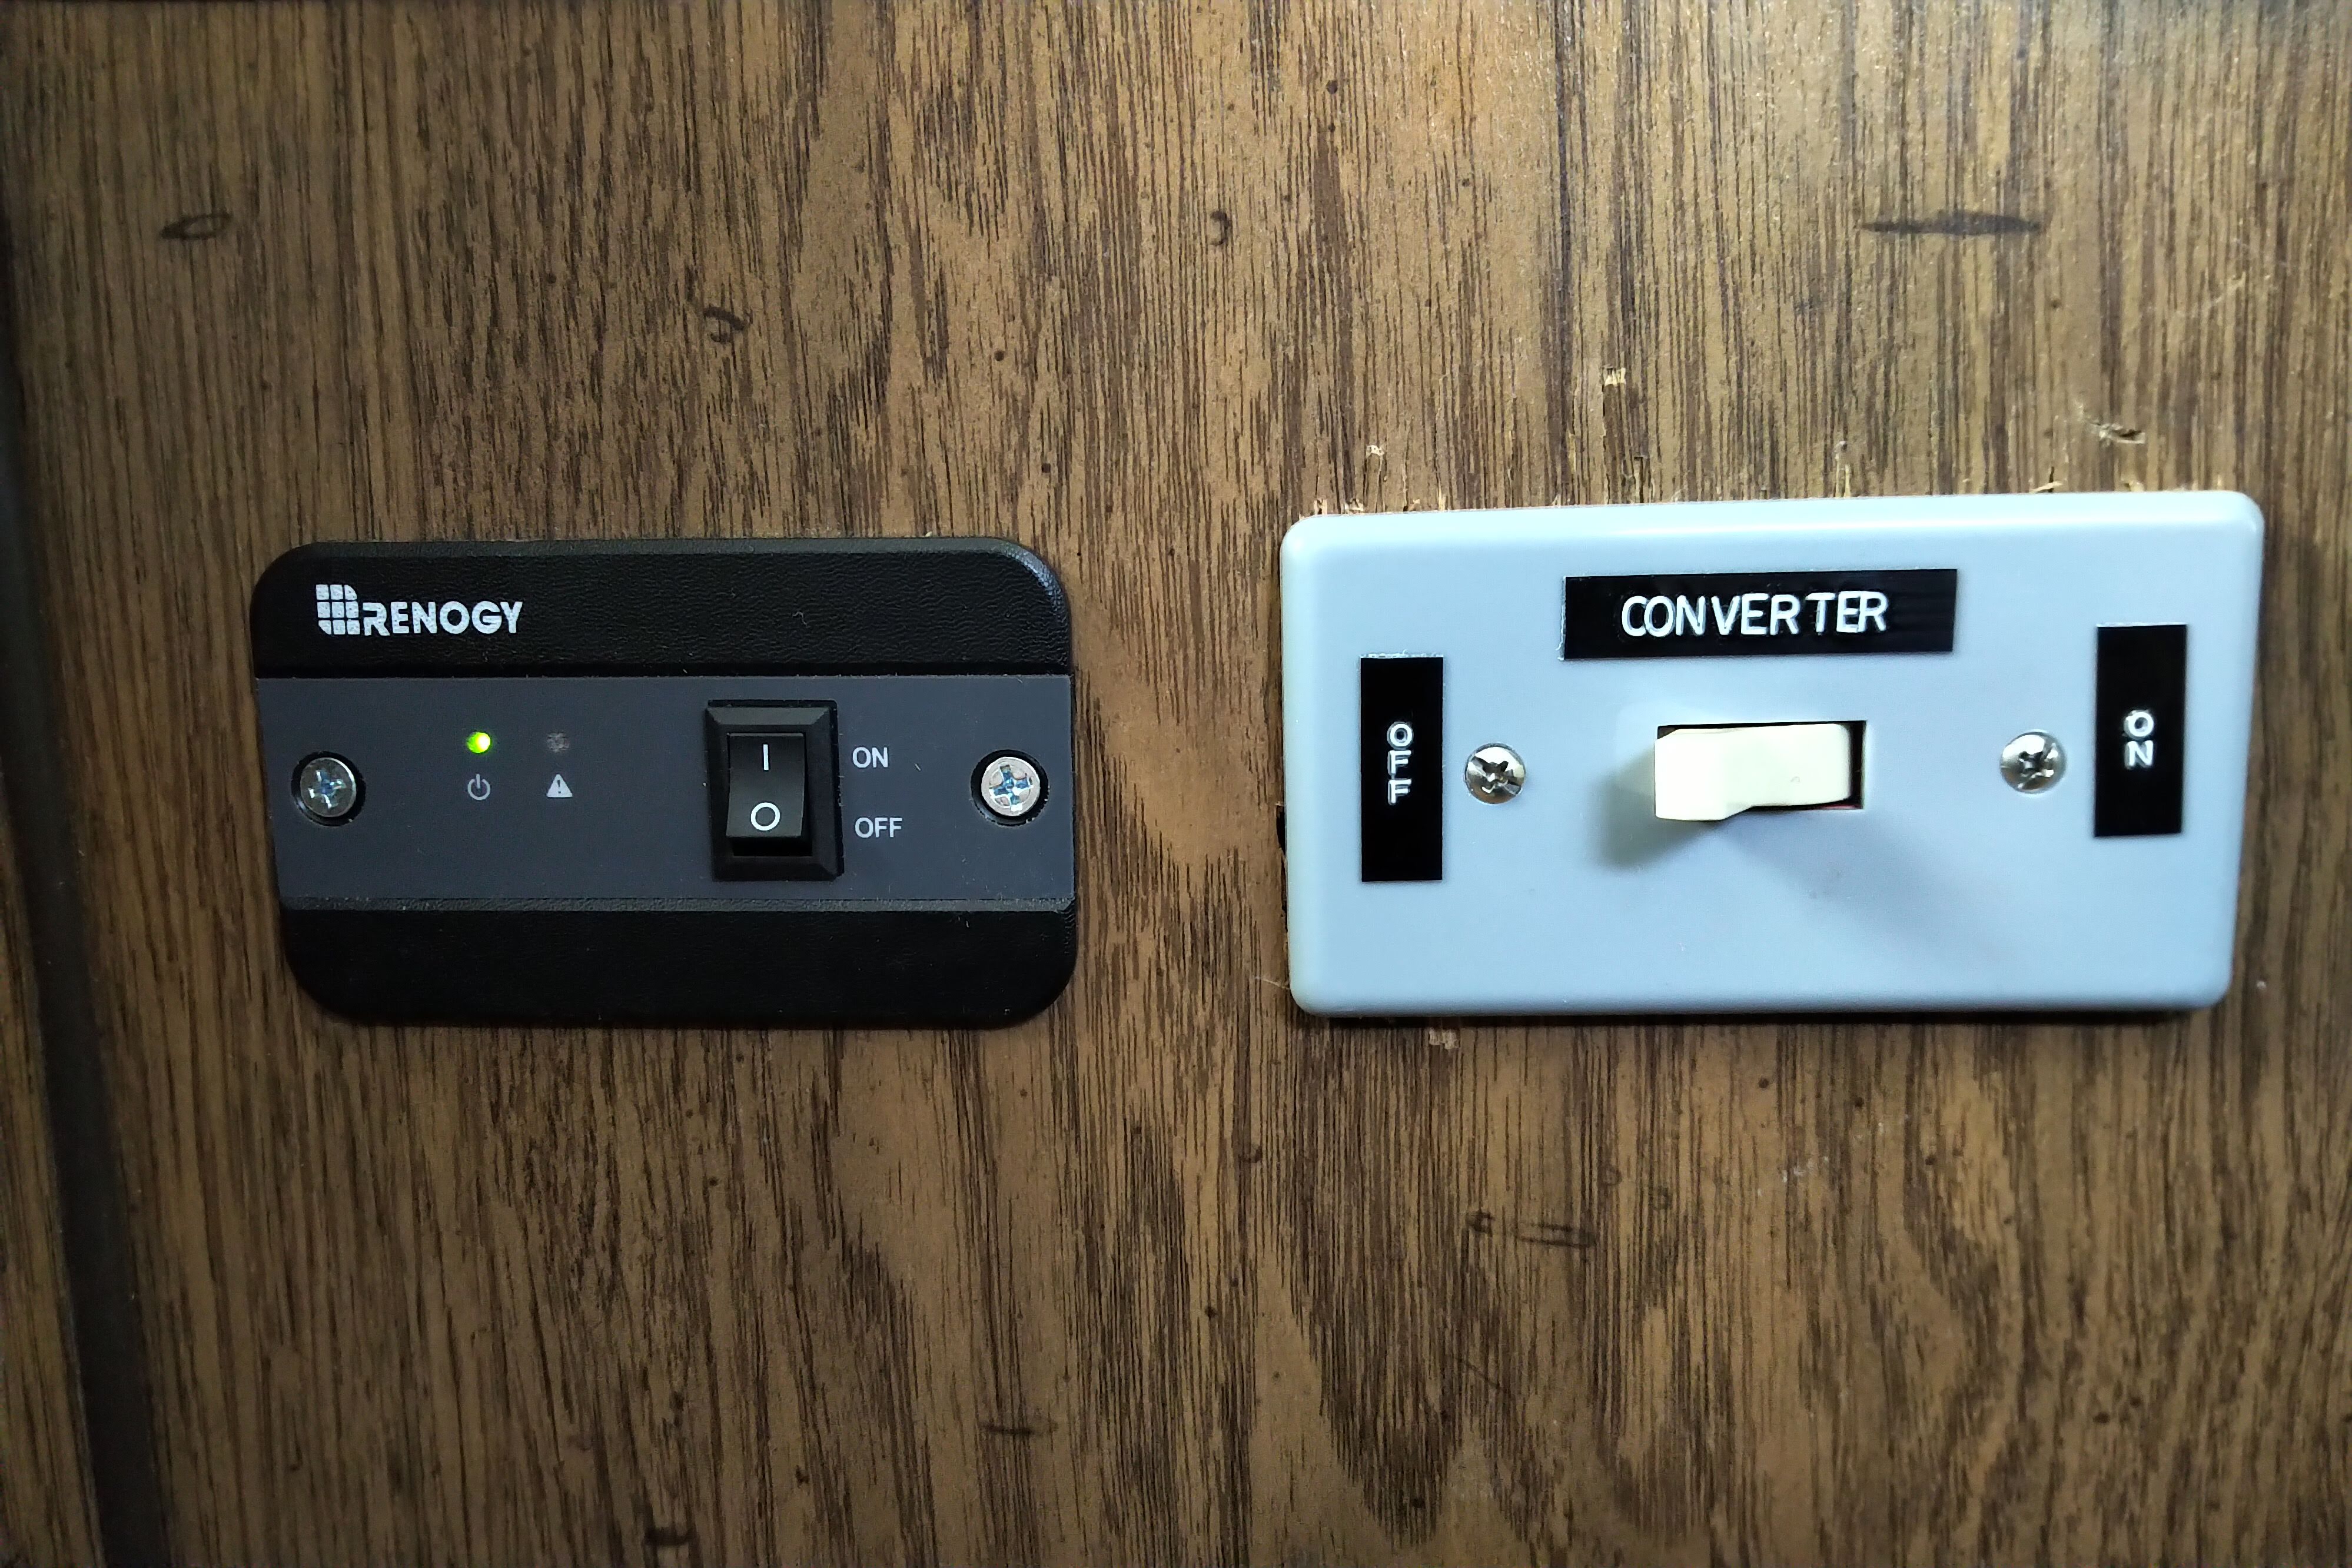
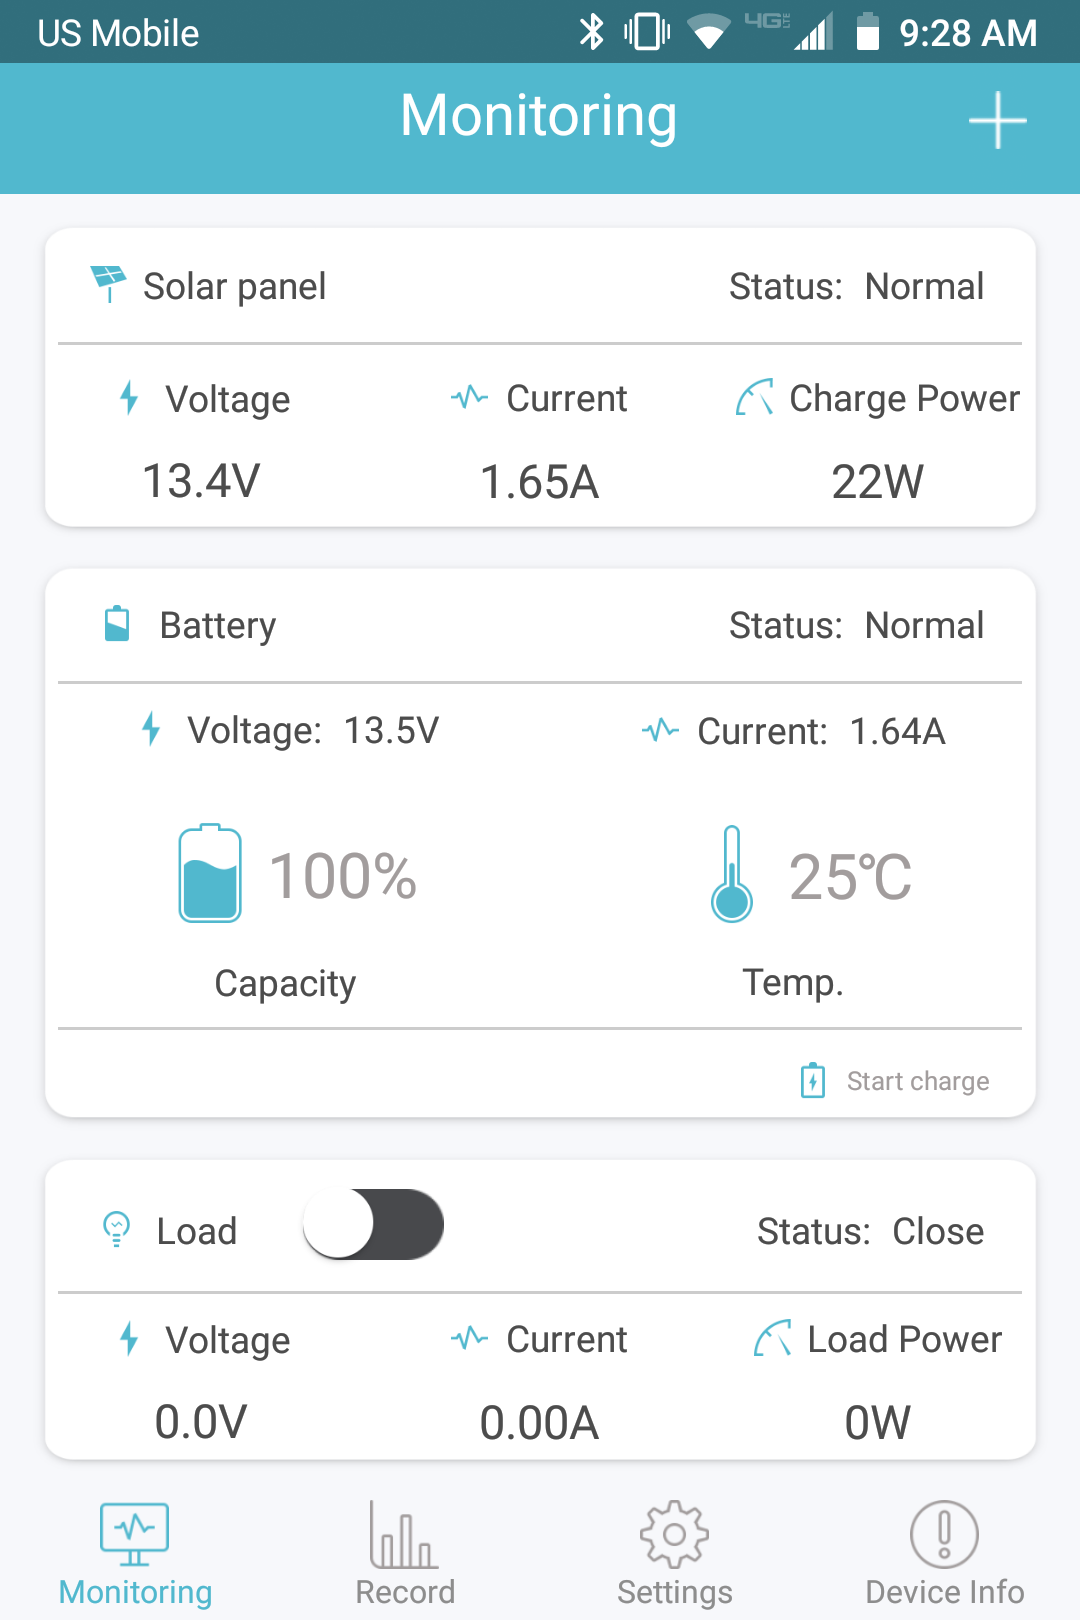
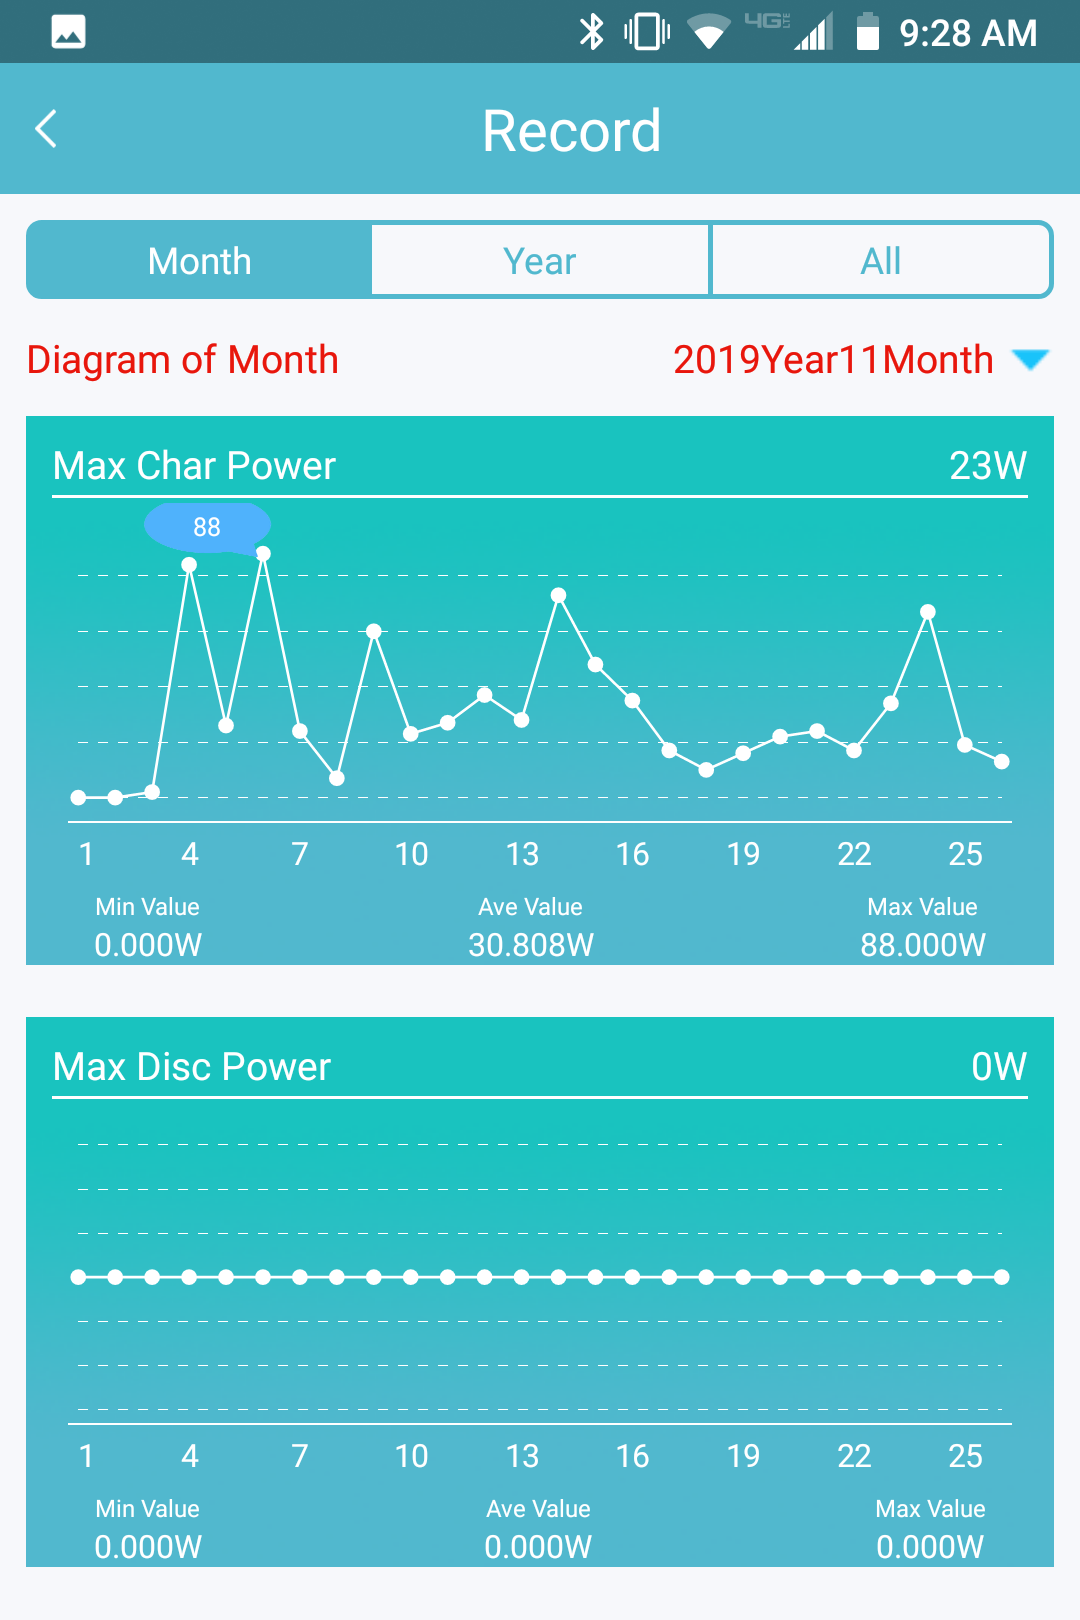
  • All lighting is running off solar power.  The power converter stays off most of the time.  New batteries will be on their way soon.
  • Plugging up holes and fixing leaks continues as always – but they are getting few and far between!

Those are some of the highlights – the vehicle is certainly drivable and livable – but there’s still a page of things we’d like to do before hitting the road.  Thanks for following along and happy new year!

– James

Electrical Upgrades

Revamping the RV’s electrical systems has been time consuming but very fun and rewarding.  I’ll first say that this sort of a system is very complicated – much more so than a house or a car – or the two combined.  It’s really it’s own animal, and I still actually haven’t figured everything out – there are still some mystery solenoids running around the place.

To give you a grand overview, the Winnebago has all the standard 12 volt car systems you’d expect.  It starts getting weird when I tell you that there are two batteries which can be ganged together for special circumstances.  Add to the fact that the vehicles wiring had been changed from the factory specifications, so nothing seemed to be working quite as it should.  Just know that one battery is supposed to run the vehicle, and the other runs the “house” 12 volt electrical system.  That how it works now, but it wasn’t like that a few weeks ago.  All the fans and “house” lighting runs off the house battery, and all the lighting is DC.  Earlier trailers had both AC and DC available at light sockets (think an early 1960’s Airstream), but by the mid 1970’s most manufacturers switched to DC lighting, which continues to this day.  Other appliances like the refrigerator and air conditioner require 12 volts for logic and memory.  I’ve also picked off 12 volts here and there to run my ham radio equipment.  The DC system has fuses galore, and I’ve added a healthy number myself.  The last major piece of DC infrastructure I added was 4 AWG wire going from the battery to the inverter and solar panels.  The 1000 watt inverter will provide 120 volts AC electrical power when the vehicle is not plugged in and the generator is not running.  This brings us to the AC side of the equation.

The RV is set up for 30 amp service, and I’ve added a transfer switch from GoPower which switches between the AC shore power and the inverter.  This is an essential item to prevent destruction of equipment or worse.  The transfer switch defaults to the inverter, so that when the shore power cord is unplugged, no voltage will be present on the now exposed cable.  When that cable is plugged into shore power, the transfer switch changes over and supplies power to the vehicle from the cable.  The inverter is now out of the equation and it doesn’t matter if it’s on or not – no damage will be done.  Worth every penny in my book.

The AC from shore power or the inverter is now fed to a small breaker box, just like the one in your house.  The only difference with this one is it allows you to switch from from shore power to generator power.  The Winnebago is equipped with a 5 kW Onan generator, which we are still working on at this time – I’ll have an update on that soon.

To change AC into DC, our friend the converter steps in.  The vehicle was equipped with a Philips converter that was working as designed.  The only problem with it was it did not produce clean DC.  This isn’t a problem for incandescent lighting, but can present a problem with 12 volt LEDs, which is what I’m running for all the lighting.  The AC in the line was starting to actually melt the solder joints inside the bulbs.  A slamming door could separate out all the circuit boards.  There’s $8 down the drain.  The new WFCO converter solved that, and is nice and quite from an RFI perspective.  I’ve added a switch to turn the converter on and off – obviously no point running it while running the inverter.

Finally, the solar system from Renogy is pretty cool.  Two, 100 watt panels on the roof dump into a charge controller, which has Bluetooth control and monitoring on a phone app.  The solar charger normally charges just the house battery, but can be switched over to charge both the house and vehicle batteries from the driver’s seat.  The batteries can also be ganged together to start the vehicle if the main starting battery is low.  The app looks at battery health and also displays charging history, which is highly dependent on how sunny the day is plus how much juice the battery needs.  It can be a bright day but they controller might only output 5 watts to keep the battery in float charge.  If battery usage suddenly increases (say I turn on a vent fan), the controller recognizes this and increases the charge power.  These sort of features are critical when maintaining battery health.  I’ll soon be upgrading the battery capacity, so stay tuned for an upcoming post on that!

I know this article was a bit longer and more technical, but I hope you at least see what kind of wide scope is involved in a project like this!

– James

The Maiden Voyage – Day 2

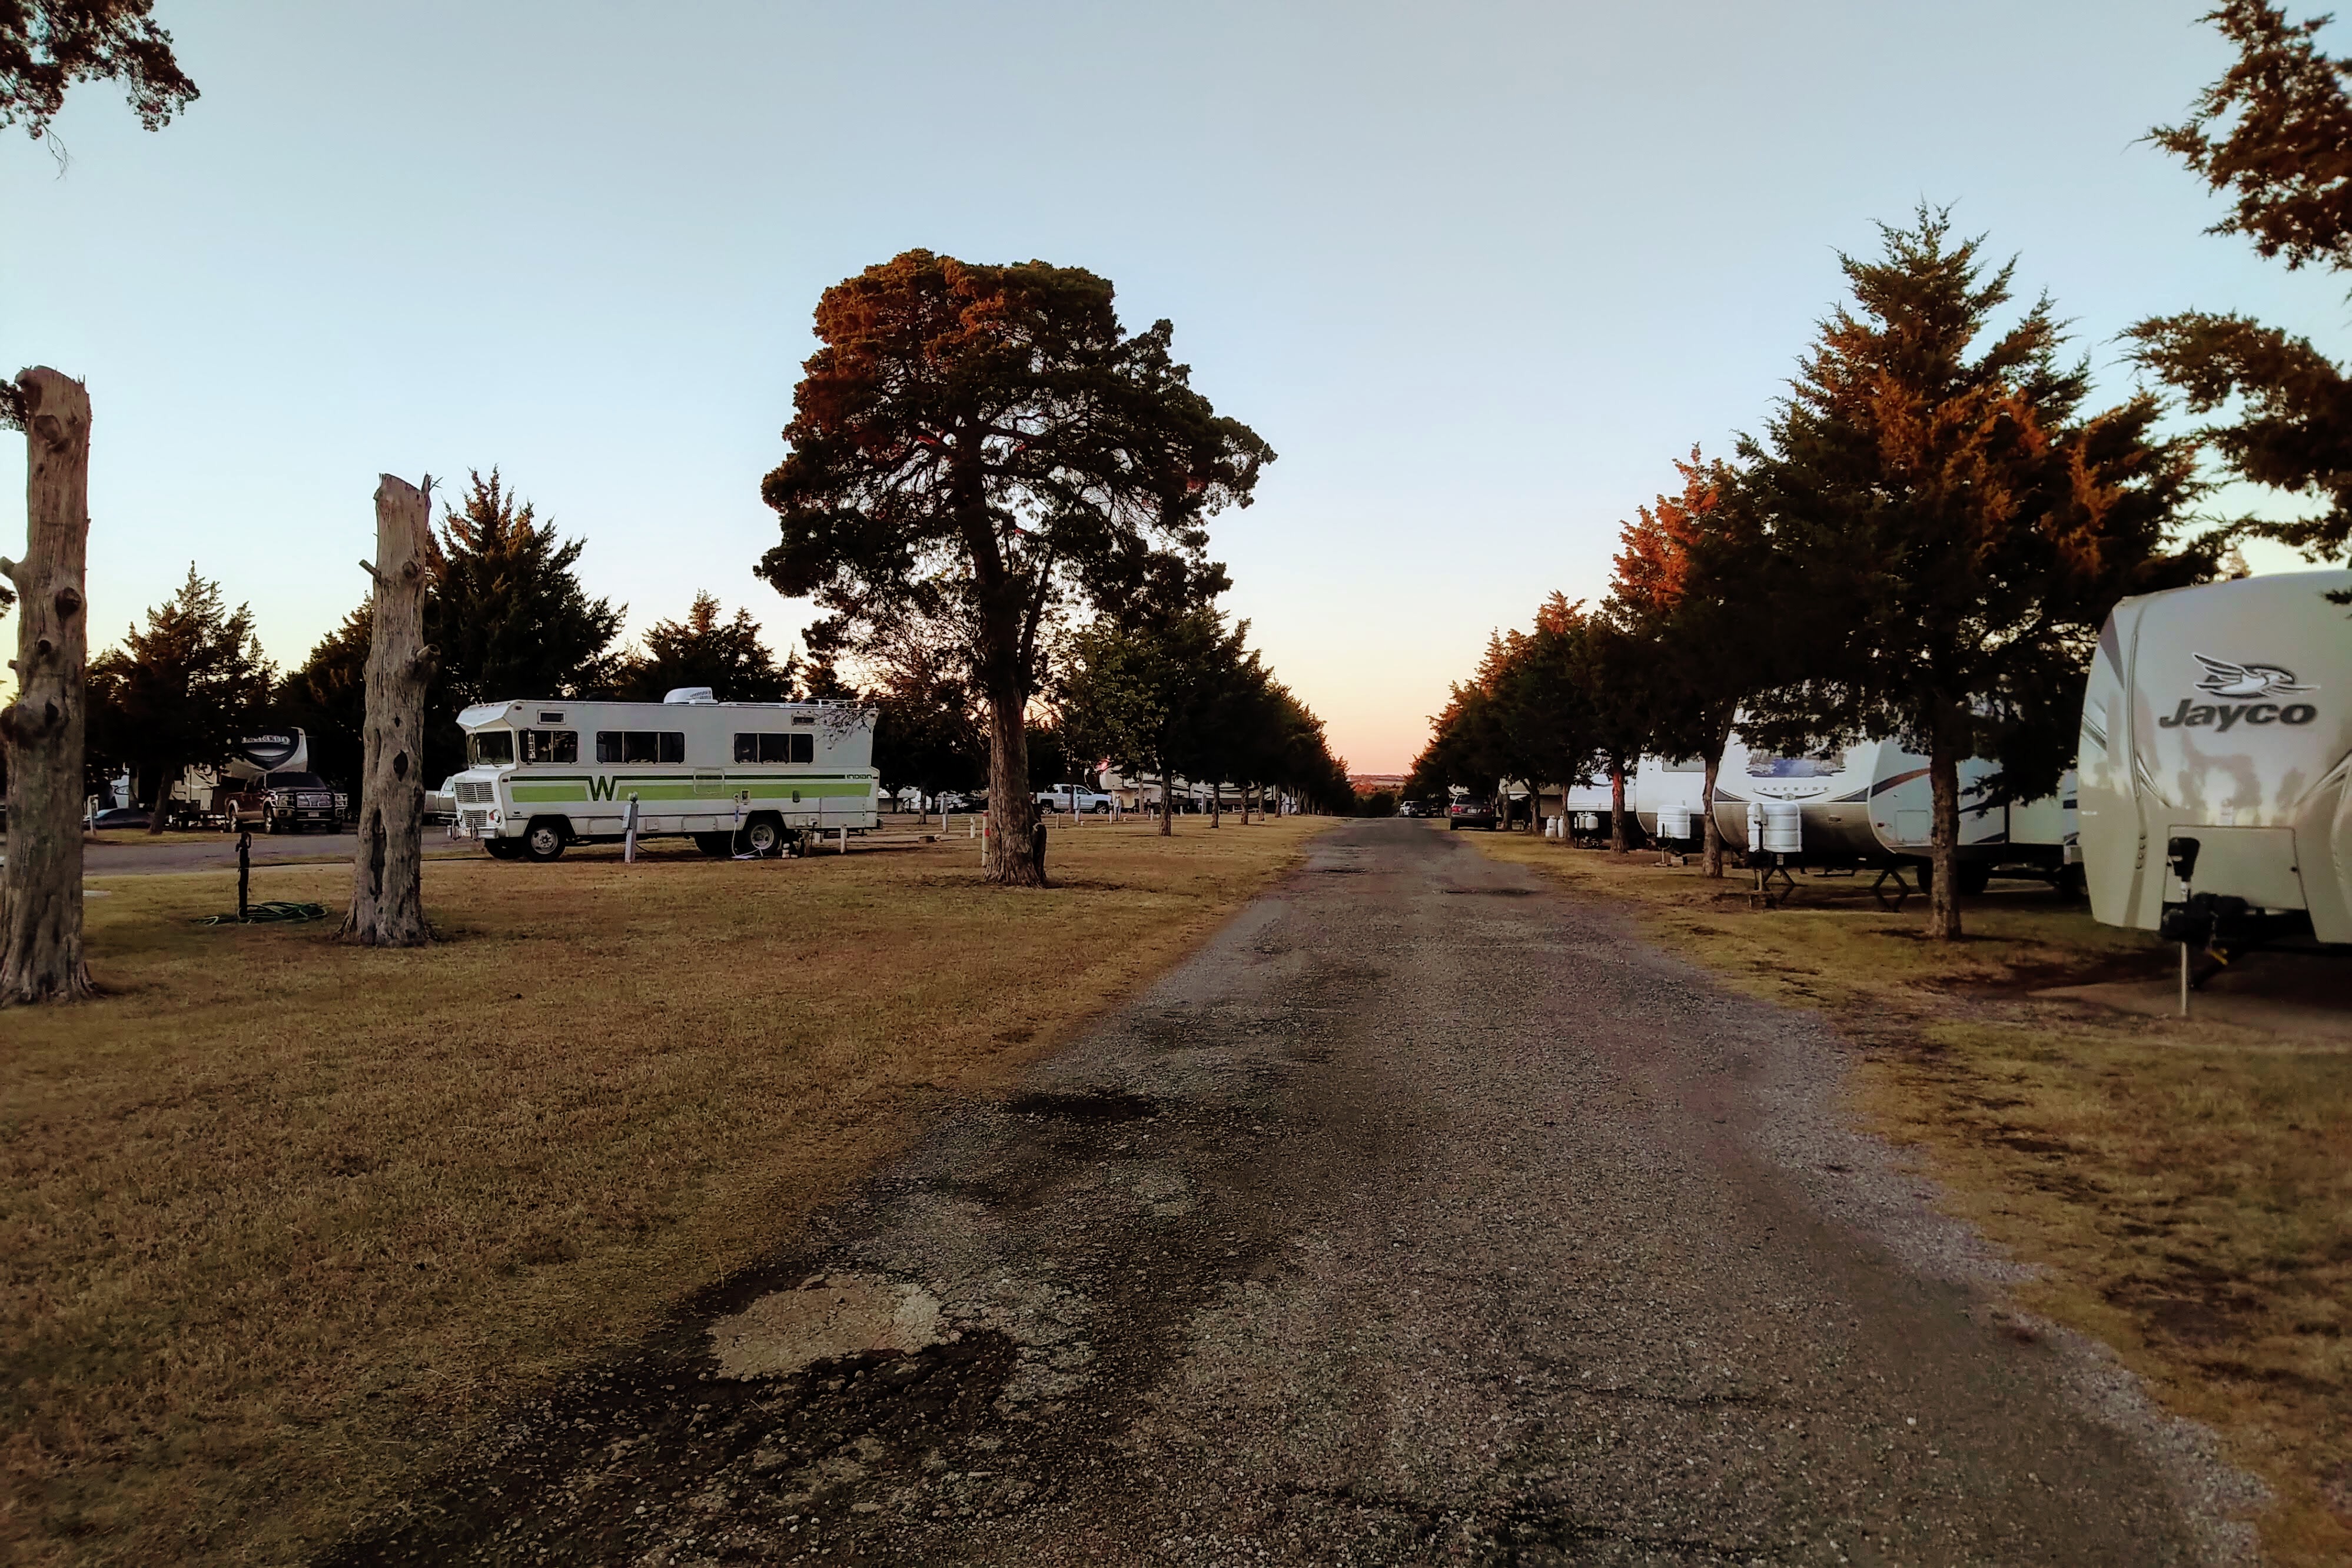
We continue the inaugural RV adventure from last time.  Sunday Morning broke at the RV park in Guthrie, Oklahoma, and bacon and eggs were prepared in short order.  We enjoyed an unhurried morning, then finally disconnected our utilities and rolled on towards town.

After a pit stop at Zion Lutheran Church in Guthrie (and an obligatory pot luck), we headed south to Oklahoma City and the National Cowboy and Western Heritage Museum.  It’s really a first-rate collection, and getting in on one of the guided tours adds a lot to the experience.  John Wane contributed heavily to the collection, and I personally enjoyed the film area of the museum immensely, which featured props and outfits from many famous westerns.

After a quick stop at an OKC outlet mall to satisfy all members of the party, we headed North for a cruise back to Wichita.  Everything seemed to be running fine until one of the alternator bearings started “talking” to us.  Shortly after those unnerving squeaking sounds started, I noticed a couple of orange flashes accompanied by much louder shrieking coming from under the engine cover between the driver’s and passenger’s seats.  This was, indeed, the sound of one of the bearings seizing in the alternator.  The first roadside emergency – this was turning out to be quite a trip!  I turned the engine off and pulled to the side of I-35 and got the added benefit of driving the vehicle a short distance without power steering or power brakes.  Thankfully, the designers of the Dodge RM-400 chassis made the vehicle with a separate belt to drive the alternator.  A quick cut with a pocket knife took the failed alternator out of the equation and we were able to limp along at 30 miles per hour towards Perry.  The self-imposed speed limit is because any faster would cause the single belt now driving the water pump to start slipping.  Oh, and the door flew open as we were getting back up to speed on the highway.  That will soon be rebuilt anyway to prevent that from happening again.  How exciting!

As you may imagine, not much is open in Perry, Oklahoma on a Sunday night, including the town’s only auto parts store, which didn’t open until 7:30 a.m. the next morning.  So, we were going to have our first boondocking experience on this trip as well.  What joy.  The night spent in the Homeland grocery store was not quite as comfortable as the previous, but it was honestly not bad, despite being in the 40’s outside.

The silver lining of stopping in Perry was a chance to eat at the Kumback Lunch, which despite the name, is open for all meals – including breakfast at 6 a.m.  This place is always a favorite stop on the way to OKC, and it came in especially handy, being one block from where we parked overnight.

After breakfast, the O’Reilly’s opened up and the friendly folks there were able to get a new alternator from Stillwater by 11 a.m., which gave us several hours to kill around the courthouse square.  After some enjoyable exploring on that rather brisk Monday, the alternator arrived and was installed after a few trips back and forth across the parking lot to the adjacent O’Reilly’s.  I must say, everyone in Perry bent over backwards to accommodate us during our unexpected stay.  In fact, I’m not sure I could think of a nicer place in which to break down.

So that’s it – after everything was in, we set for home, making a pit stop for lunch at Mary’s Grill in Tonkawa.  I’d say it was an excellent shakedown cruise, because we really got a taste of almost everything, including an inaugural visit to a dump station, which I almost forgot to mention.

Moving forward, work resumes on the project, including finishing up the solar wiring, studio projects, climate controls and more.  Stay tuned!


The Maiden Voyage – Day 1

The day finally came to take the Winnebago out on her first journey over 100 miles since I bought her.  The destination: Oklahoma.  Since my folks have been so instrumental in this restoration process, I figured they had earned their ticked aboard the vehicle.  The three of us set out from Wichita, KS around 1 p.m. after performing the final checks and loading everything in.  The plan was simply to spend the night in an RV park in Oklahoma and come back the next day (Sunday).  After a trip to the gas station and topping off the aux tank (17 gallons), we were on our way!

The primary purpose of this trip besides testing out the rest of the on-board systems was actually to get the flat spots out of the tires, which had developed from the vehicle sitting so long.  At certain speeds, the flat spots create a shimmy that’s quite noticeable.  I’m happy to report it was successfully reduced, although we still have some work to do on that regard.

We opted to take old US 81 (which turns into US 177 near the Oklahoma border) instead of the Kansas Turnpike for obvious reasons including speed, since we didn’t plan on going over 60 miles per hour on this trip.  It’s a good reminder to anyone unfamiliar with these vehicles that they are loud!  Almost as loud, in fact, as the cockpit of a Cessna 182.

Several hours later, we arrived at the Cedar Valley RV Park in Guthrie, Oklahoma.  The Winnebago certainly stood out among a sea of nondescript Jaycos and Fleetwoods.  This was actually my first time setting foot in a dedicated RV park (as opposed to a “trailer park” which has more modular homes).  Despite the number of campers (close to 80), it was very quiet and people kept to themselves.  Some were obviously planning to stay the winter as they had everything insulated and 420 lb propane tanks outside their vehicles.  One thing the average person might overlook is your RV water supply during the winter.  Each site has a spigot, and people get creative with ways of insulating their fresh water supply lines.  It did not get below freezing while we were there, but a sign at the front desk reminded visitors to top off their fresh tanks and disconnect hoses if they don’t have a way of insulating the spigots, as it can cost $200 to replace them.

After fresh and wastewater connections were made in addition to 30 amp electrical service, meal preparations could commence.  The Indian galley is equipped with a 3-burner Coleman stove and oven, double sink, microwave and 3-way power Norcold refrigerator.  All were put to the test this trip and performed well.

James, Steve and Karen Copeland eat their first hot meal in the RV

The food didn’t turn out too bad either.  Not long after, it was time to fire up the Coleman furnace and turn in for the night.  Tomorrow was Sunday and none of us were quite expecting what would happen the next day.

To find out, stay tuned for PART 2 of The Maiden Voyage – coming soon!

– James

Building the studio

The radio studio inside the Winnebago is, without a doubt, the icing on the cake.  It’s certainly what I’ve been most looking forward to, and the materials have come from far and wide.  The studio is located where one of the twin beds used to be, which came out long ago. The hot water heater and a wheel well is located under the desk, plus some plumbing – all very manageable to box in.  The desk surface is 1/2 inch medium density fiberboard.  The top is finished with a layer of Formica.  With all the right tools, the Formica was surprisingly easy to install and the adhesive is truly amazing stuff.

You’ll notice the perforated acoustic ceiling tiles pictured below.  Those were a staple of radio studio construction for years, yet are rather hard to find now.  From what I can tell, there’s only one company, Classic Acoustical, still making these tiles and you need to buy a large quantity.  I was fortunate enough to reclaim these tiles from a dumpster outside Eisenhower Hall on the K-State campus months ago when it was being remodeled, so they are without a doubt the oldest parts of the RV, being from 1951.  They did require some touching up, which I accomplished with a combination of ceiling paint and flat white spray paint.  Not all the tiles have been installed yet, so look for another update in the coming weeks.

We still need to finish the structure under the desk, but the shelf over the desk is largely finished and wired.  I scored some vintage-looking 12 volt LED lights that cast a nice warm glow over the studio, plus a fluorescent-type LED fixture – all of which can be controlled independently.  Everything performed great during the WLHA Halloween Special, which was the inaugural broadcast for the studio.

Many more projects are coming up, including a test road trip.  Stay tuned!

-James

The floor is finished!

The floor is finally finished, and there was much rejoicing!  I decided to go with EZ Click Luxury Savannah Oak flooring.  I had originally picked out some flooring that did not click together and required adhesive plus renting a 100-pound roller.  The more I thought about it and researched, the less I liked the idea of putting adhesive on the subfloor.  Many folks putting new floors in RVs are going with the “floating” floor idea, which is what this is.  There’s no adhesive, you just leave a 1/4 inch gap on all sides and put quarter round around the edges, and it works great!  I’m very happy with this decision.

It took a solid day to install the flooring and do most of the quarter round, as most straight runs around the perimeter are less than a foot.  The dinette was also rebuilt and all the cushions were washed and re-stuffed before everything was reinstalled over the new floor.  Now that these basics are done, curtains can be installed and the very exciting studio project can begin!

– James