Revamping the RV’s electrical systems has been time consuming but very fun and rewarding. I’ll first say that this sort of a system is very complicated – much more so than a house or a car – or the two combined. It’s really it’s own animal, and I still actually haven’t figured everything out – there are still some mystery solenoids running around the place.
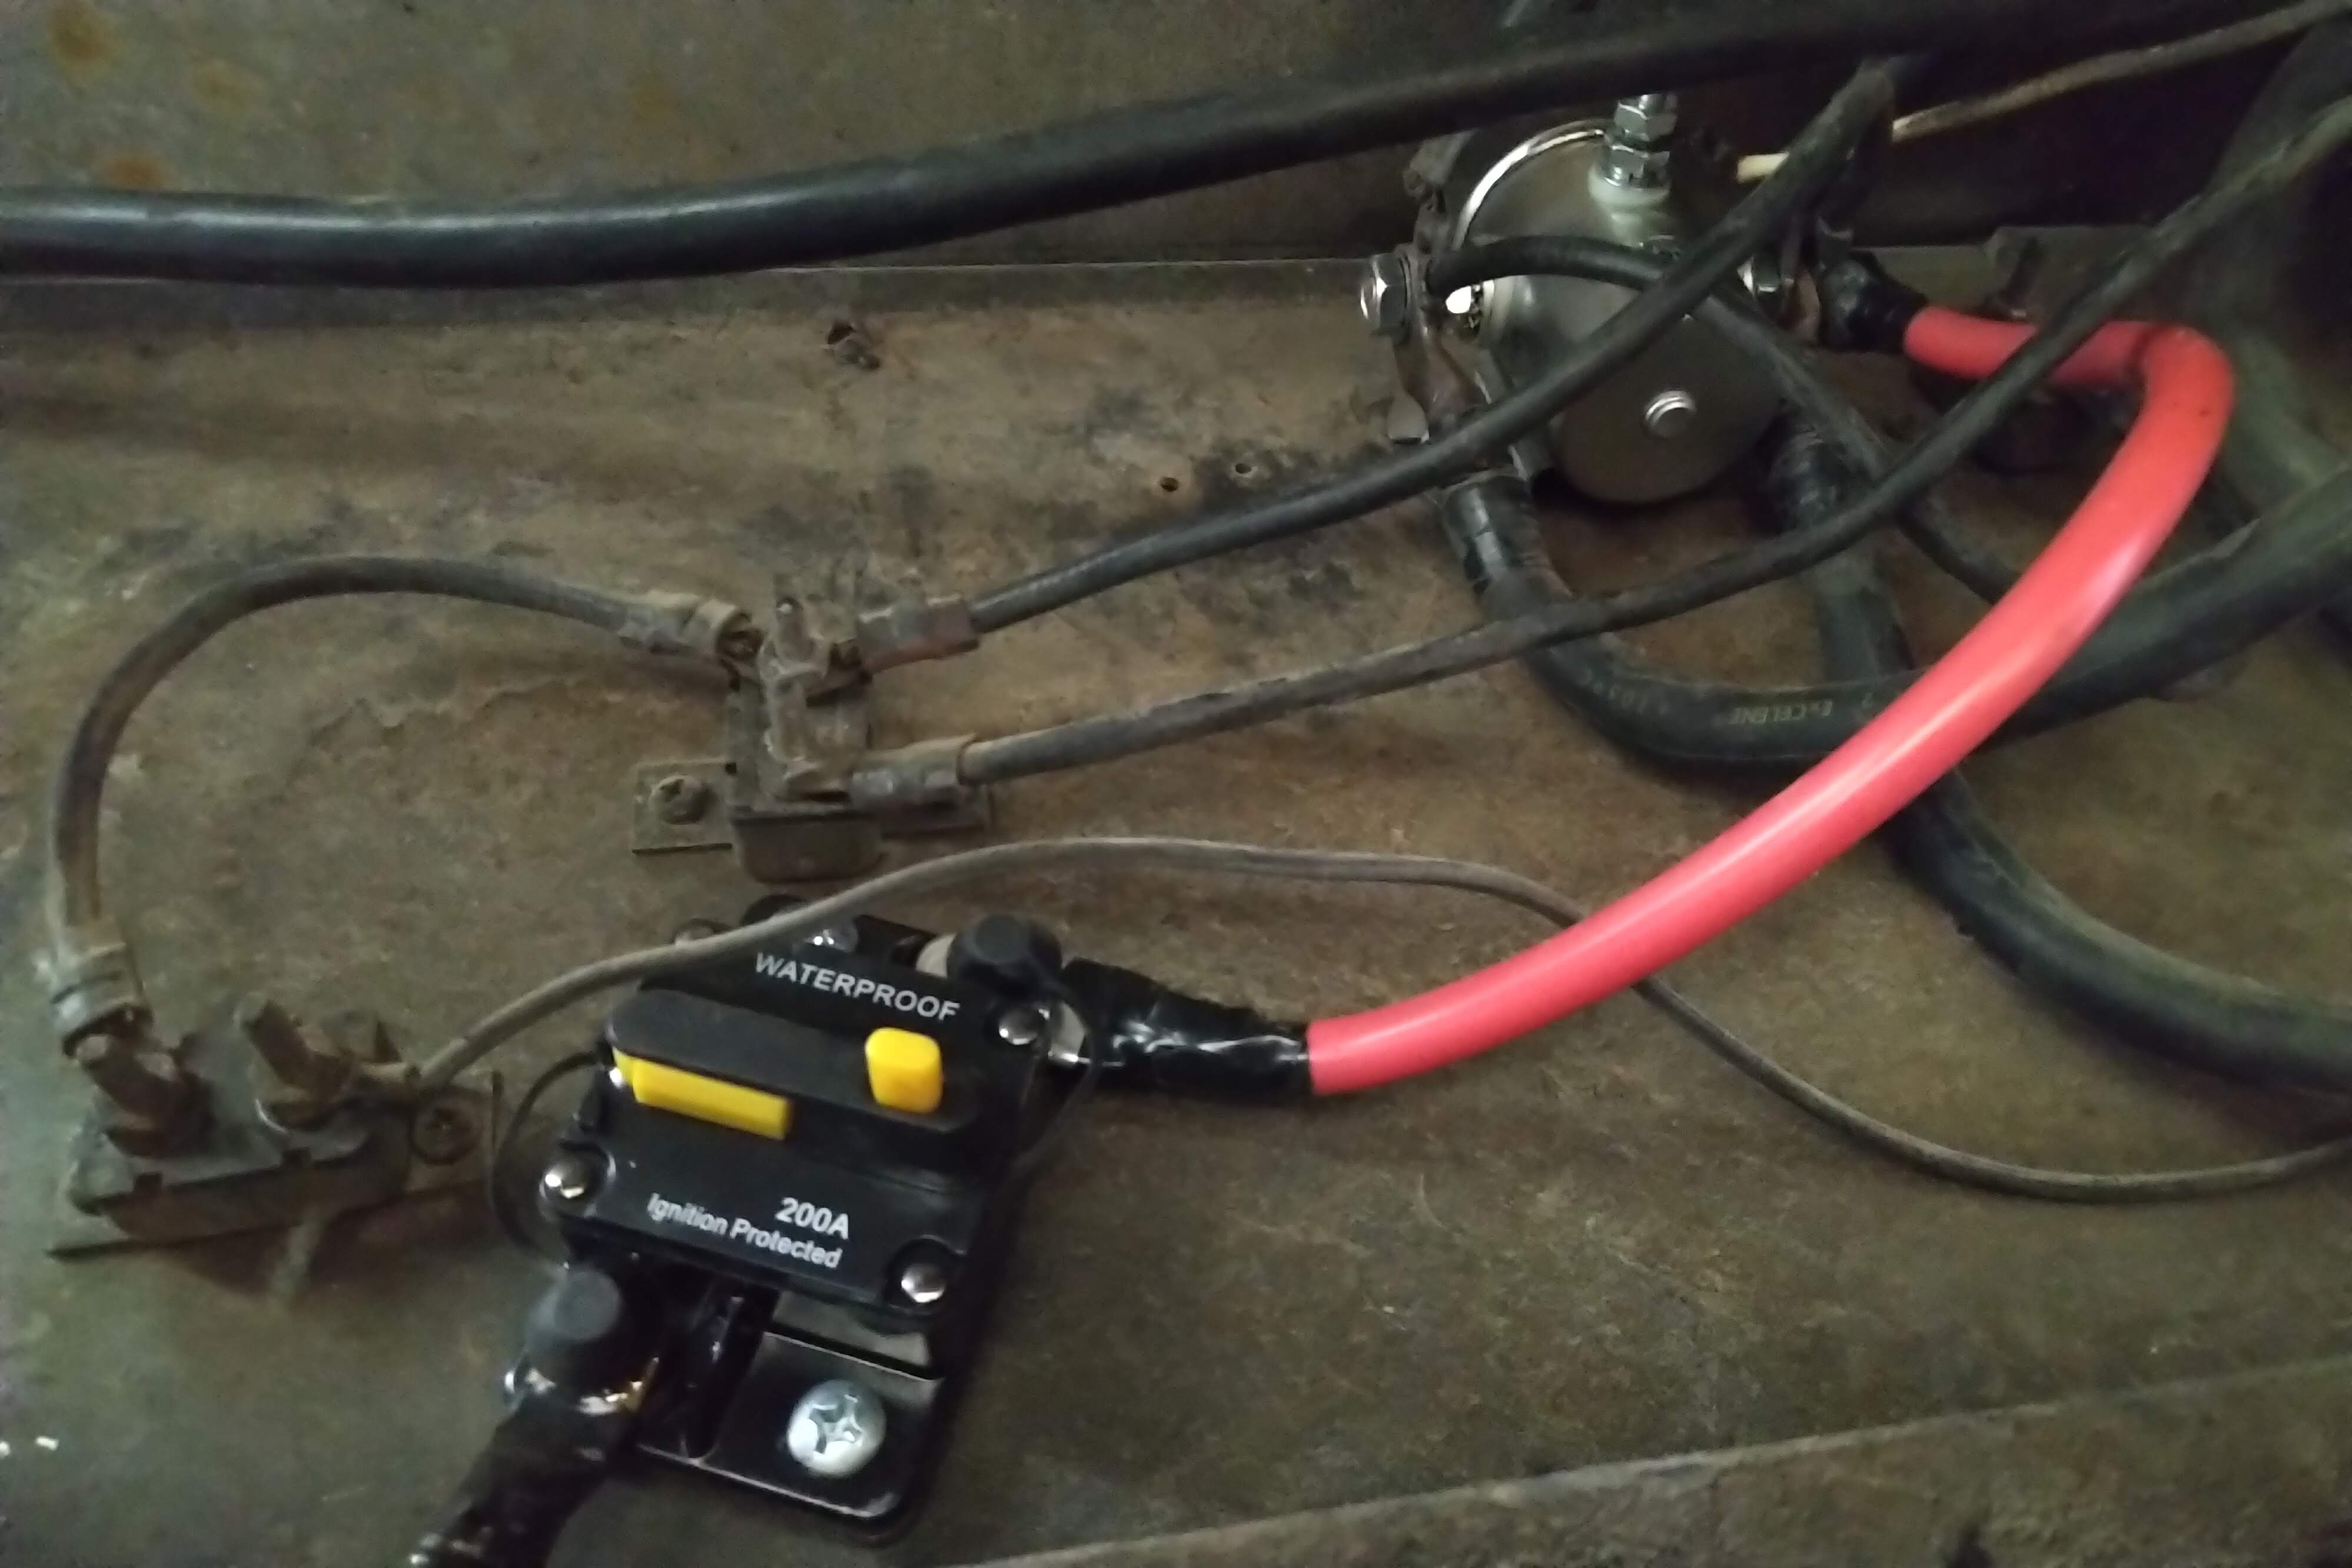
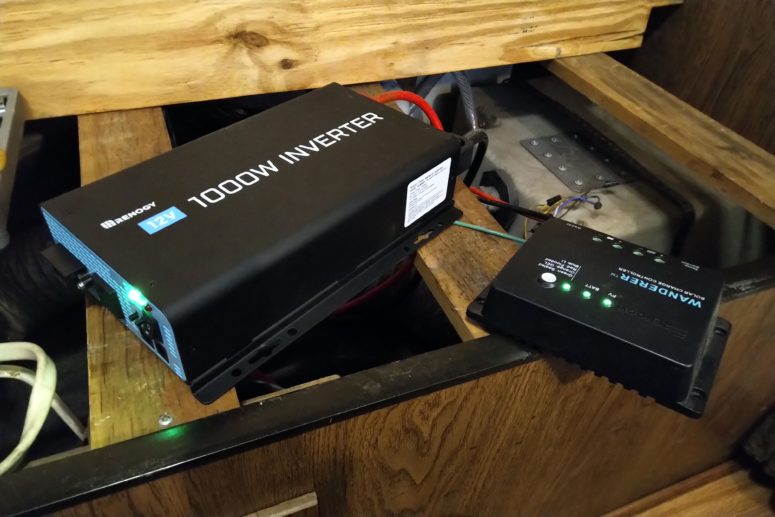
To give you a grand overview, the Winnebago has all the standard 12 volt car systems you’d expect. It starts getting weird when I tell you that there are two batteries which can be ganged together for special circumstances. Add to the fact that the vehicles wiring had been changed from the factory specifications, so nothing seemed to be working quite as it should. Just know that one battery is supposed to run the vehicle, and the other runs the “house” 12 volt electrical system. That how it works now, but it wasn’t like that a few weeks ago. All the fans and “house” lighting runs off the house battery, and all the lighting is DC. Earlier trailers had both AC and DC available at light sockets (think an early 1960’s Airstream), but by the mid 1970’s most manufacturers switched to DC lighting, which continues to this day. Other appliances like the refrigerator and air conditioner require 12 volts for logic and memory. I’ve also picked off 12 volts here and there to run my ham radio equipment. The DC system has fuses galore, and I’ve added a healthy number myself. The last major piece of DC infrastructure I added was 4 AWG wire going from the battery to the inverter and solar panels. The 1000 watt inverter will provide 120 volts AC electrical power when the vehicle is not plugged in and the generator is not running. This brings us to the AC side of the equation.
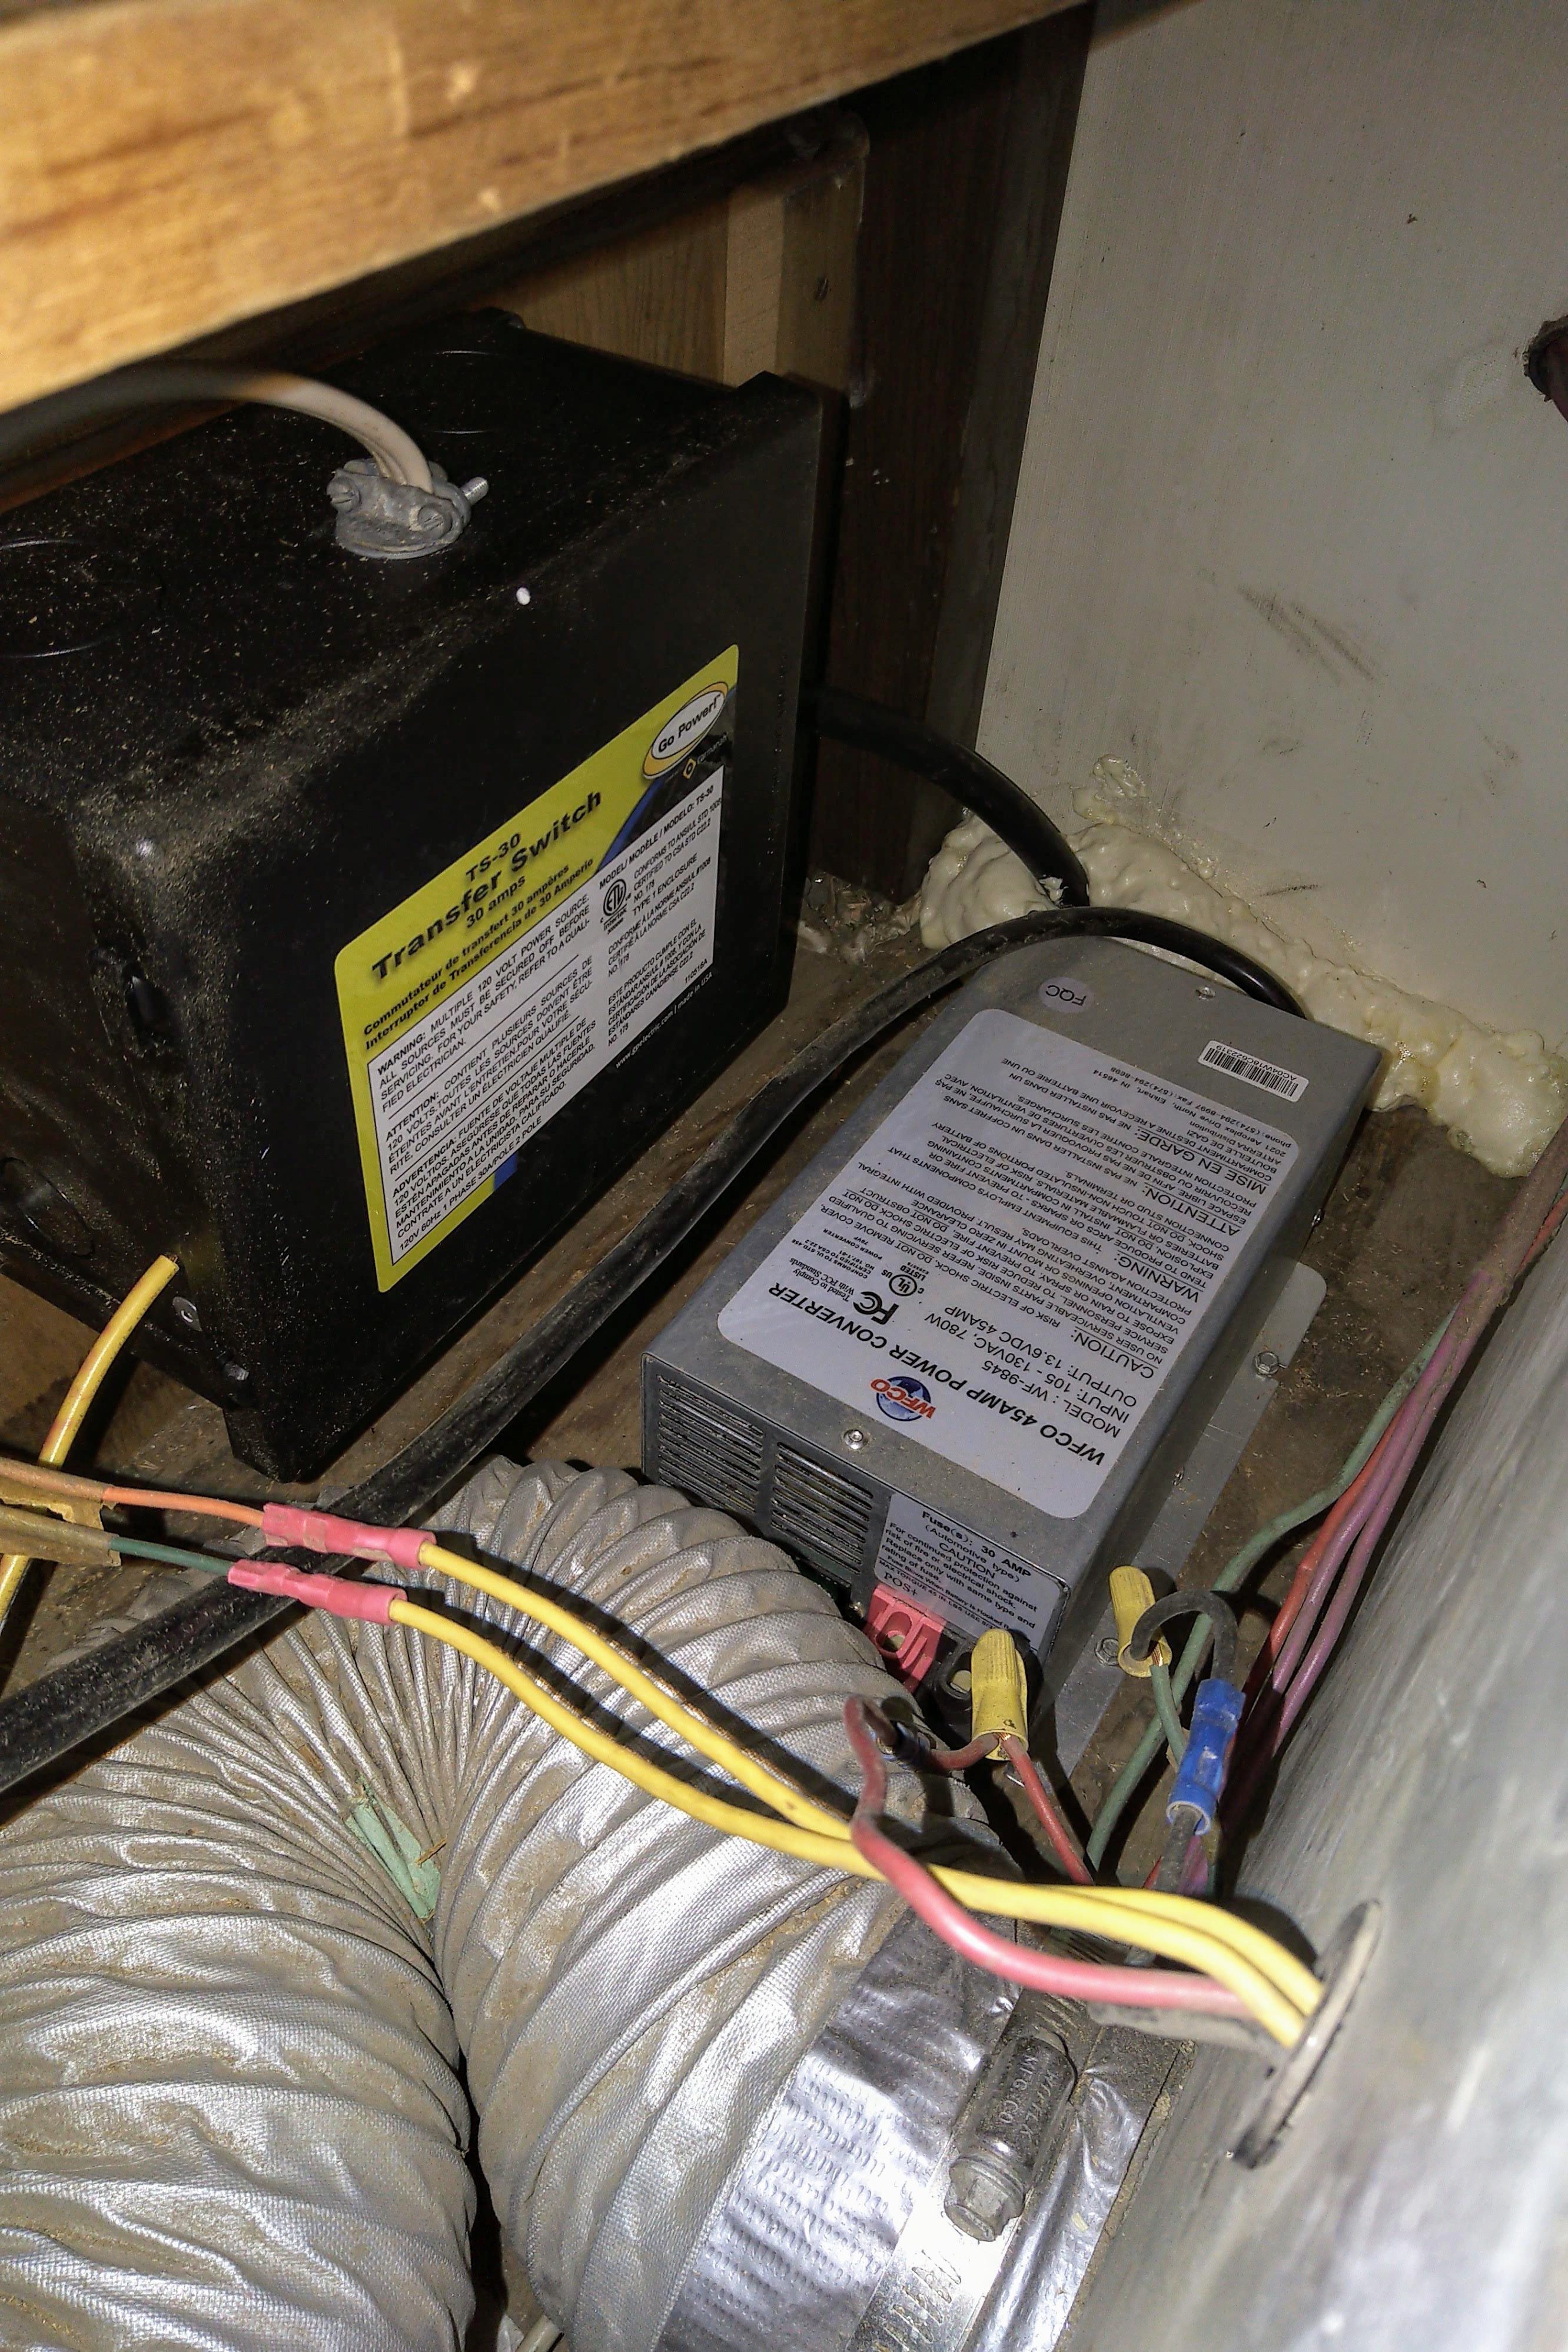
The RV is set up for 30 amp service, and I’ve added a transfer switch from GoPower which switches between the AC shore power and the inverter. This is an essential item to prevent destruction of equipment or worse. The transfer switch defaults to the inverter, so that when the shore power cord is unplugged, no voltage will be present on the now exposed cable. When that cable is plugged into shore power, the transfer switch changes over and supplies power to the vehicle from the cable. The inverter is now out of the equation and it doesn’t matter if it’s on or not – no damage will be done. Worth every penny in my book.
The AC from shore power or the inverter is now fed to a small breaker box, just like the one in your house. The only difference with this one is it allows you to switch from from shore power to generator power. The Winnebago is equipped with a 5 kW Onan generator, which we are still working on at this time – I’ll have an update on that soon.
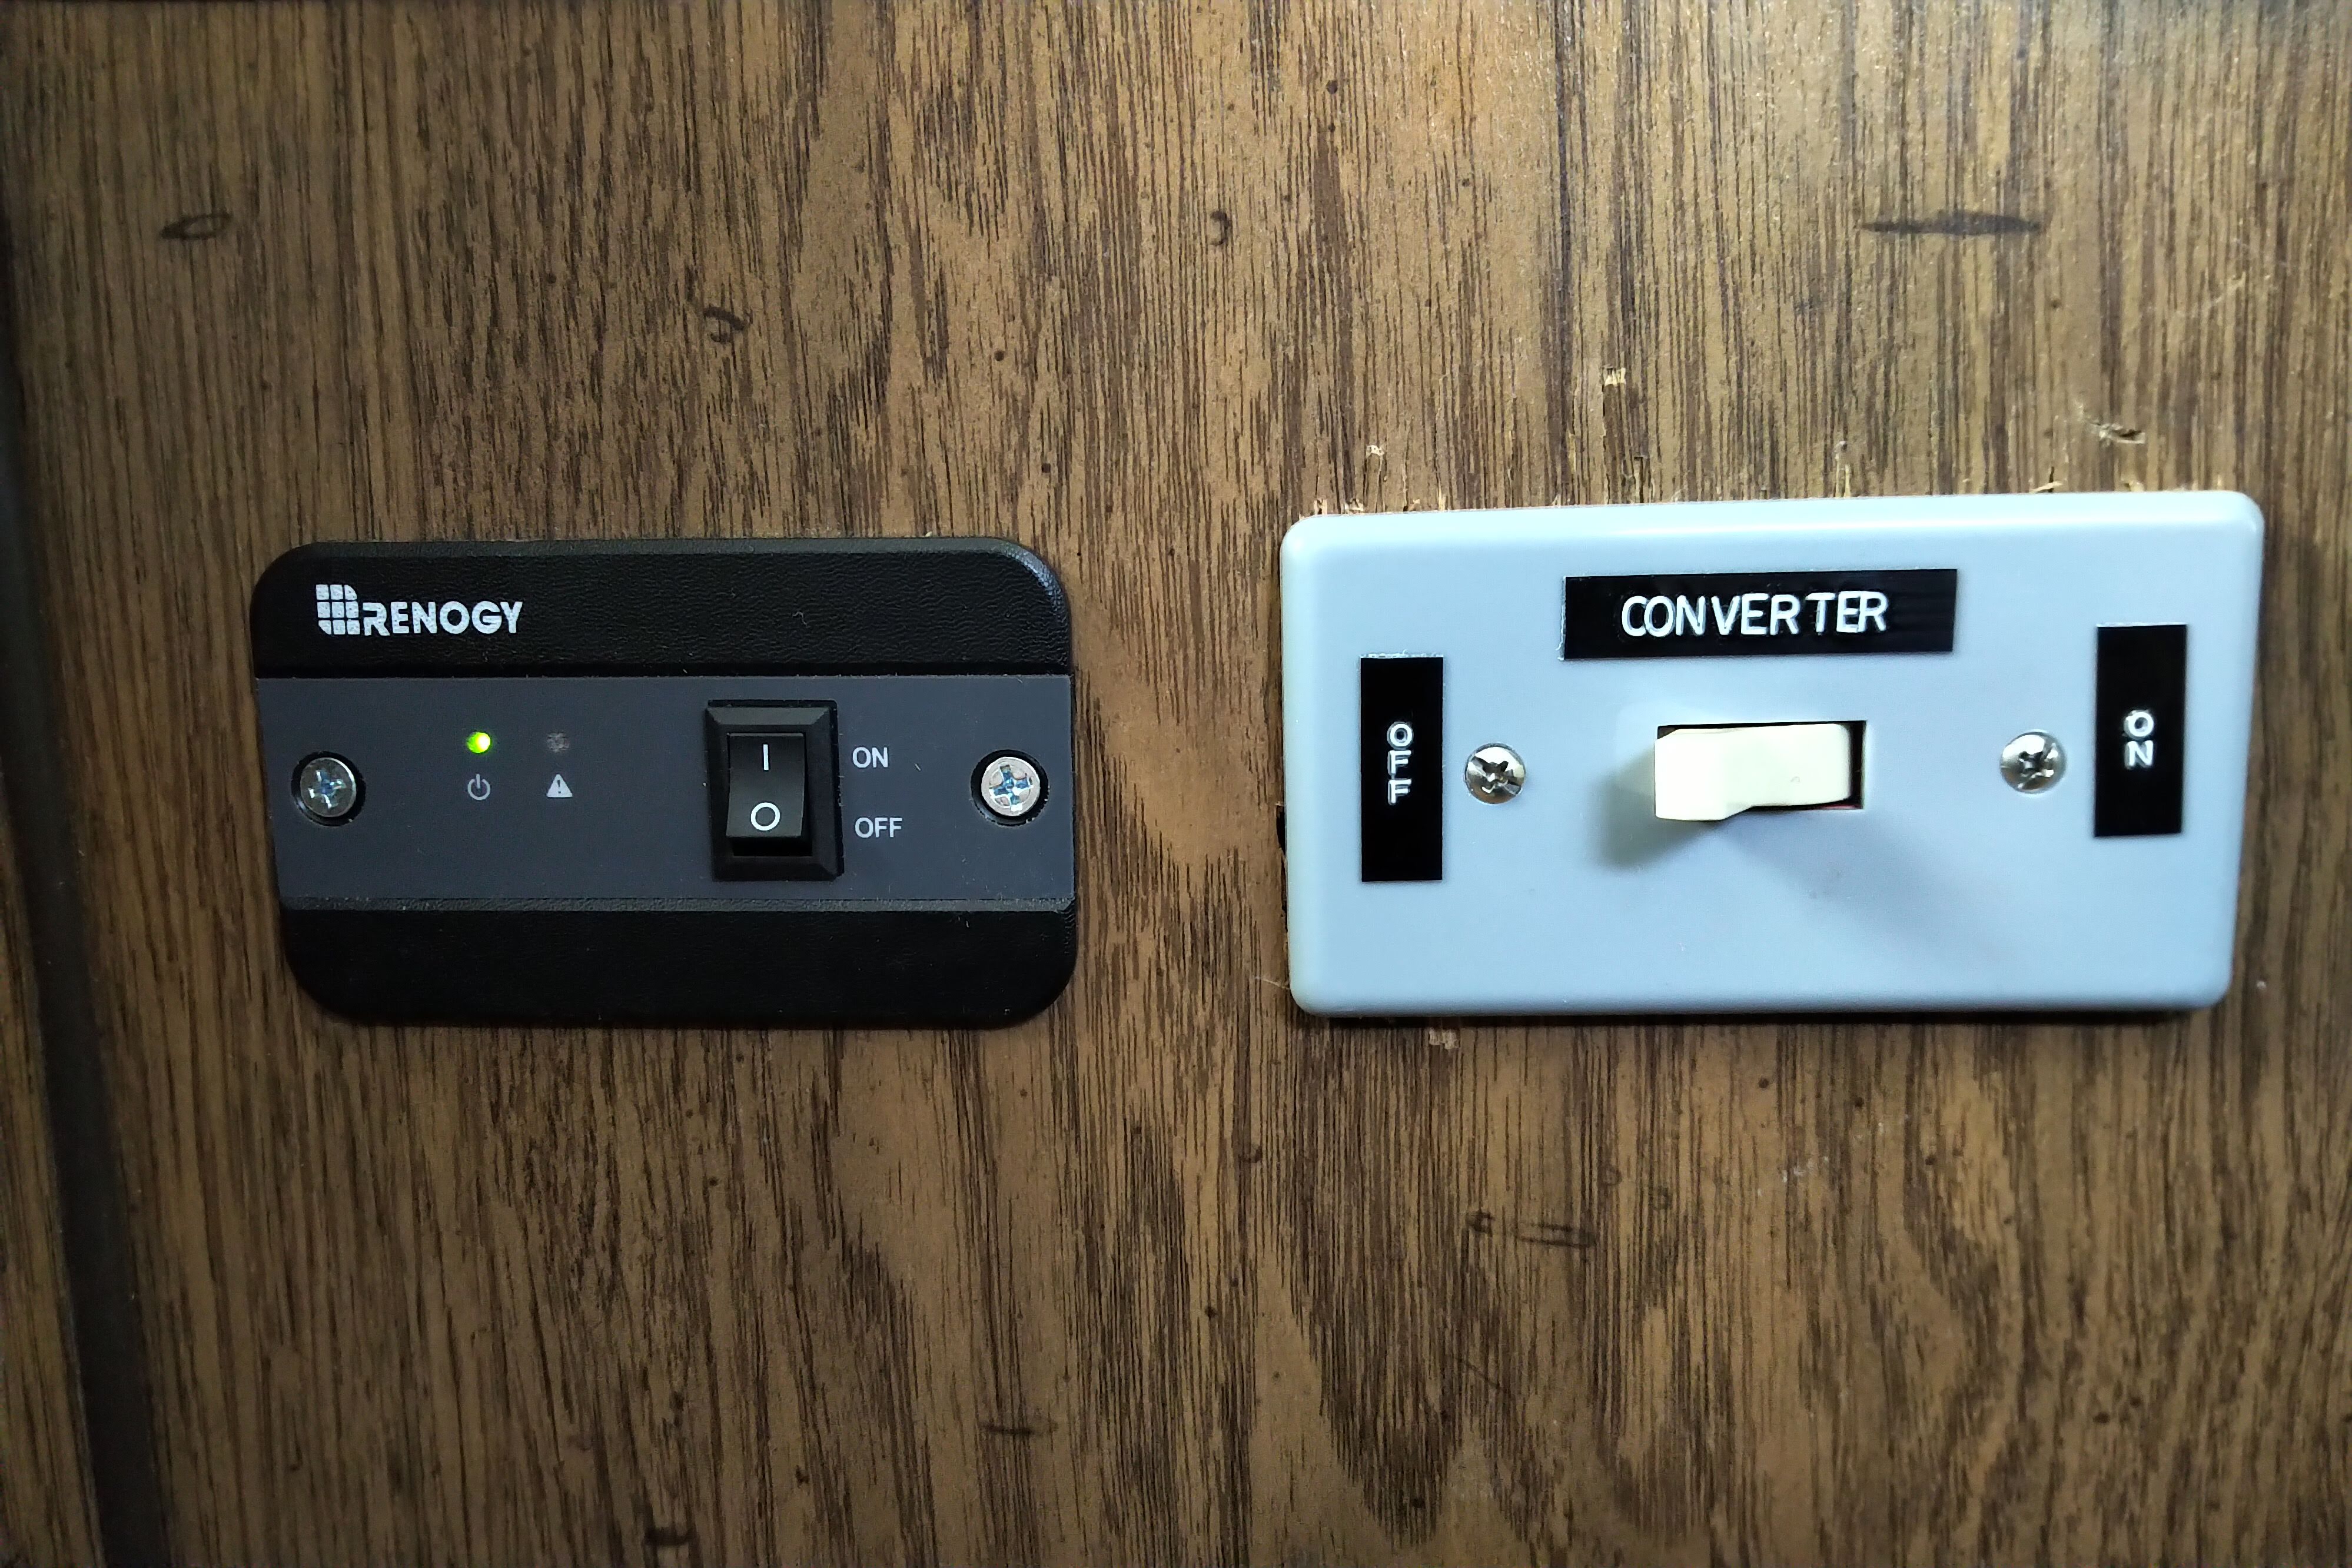
To change AC into DC, our friend the converter steps in. The vehicle was equipped with a Philips converter that was working as designed. The only problem with it was it did not produce clean DC. This isn’t a problem for incandescent lighting, but can present a problem with 12 volt LEDs, which is what I’m running for all the lighting. The AC in the line was starting to actually melt the solder joints inside the bulbs. A slamming door could separate out all the circuit boards. There’s $8 down the drain. The new WFCO converter solved that, and is nice and quite from an RFI perspective. I’ve added a switch to turn the converter on and off – obviously no point running it while running the inverter.
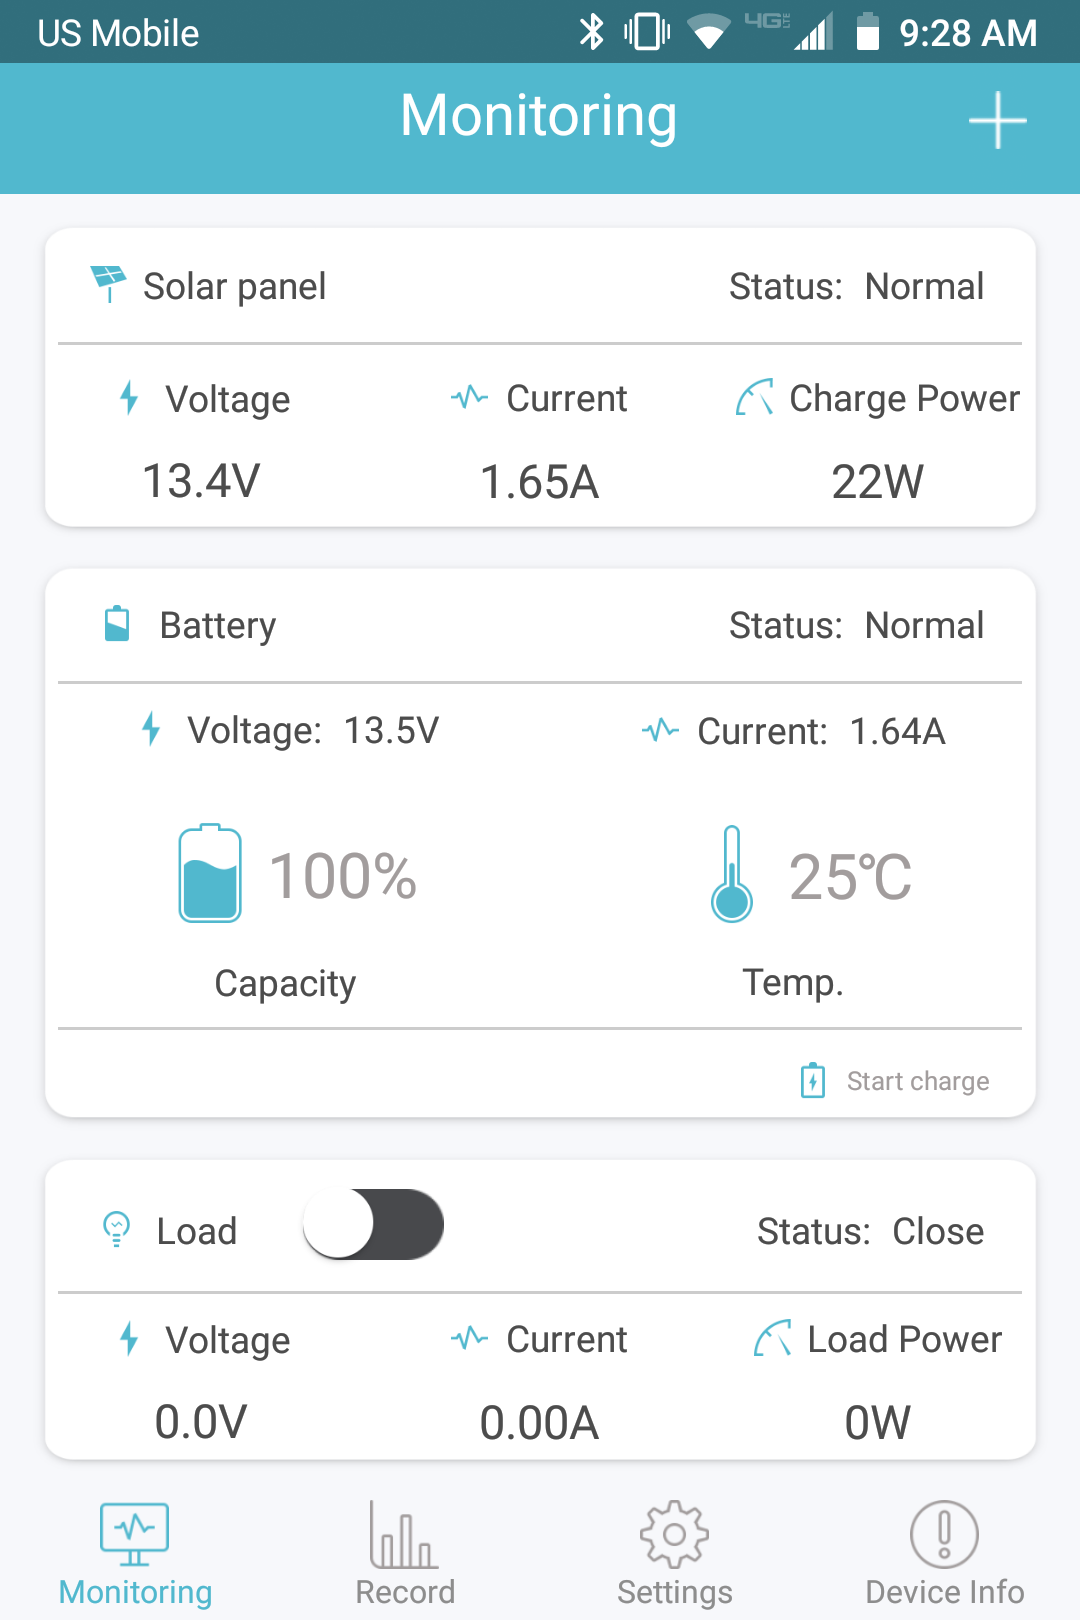
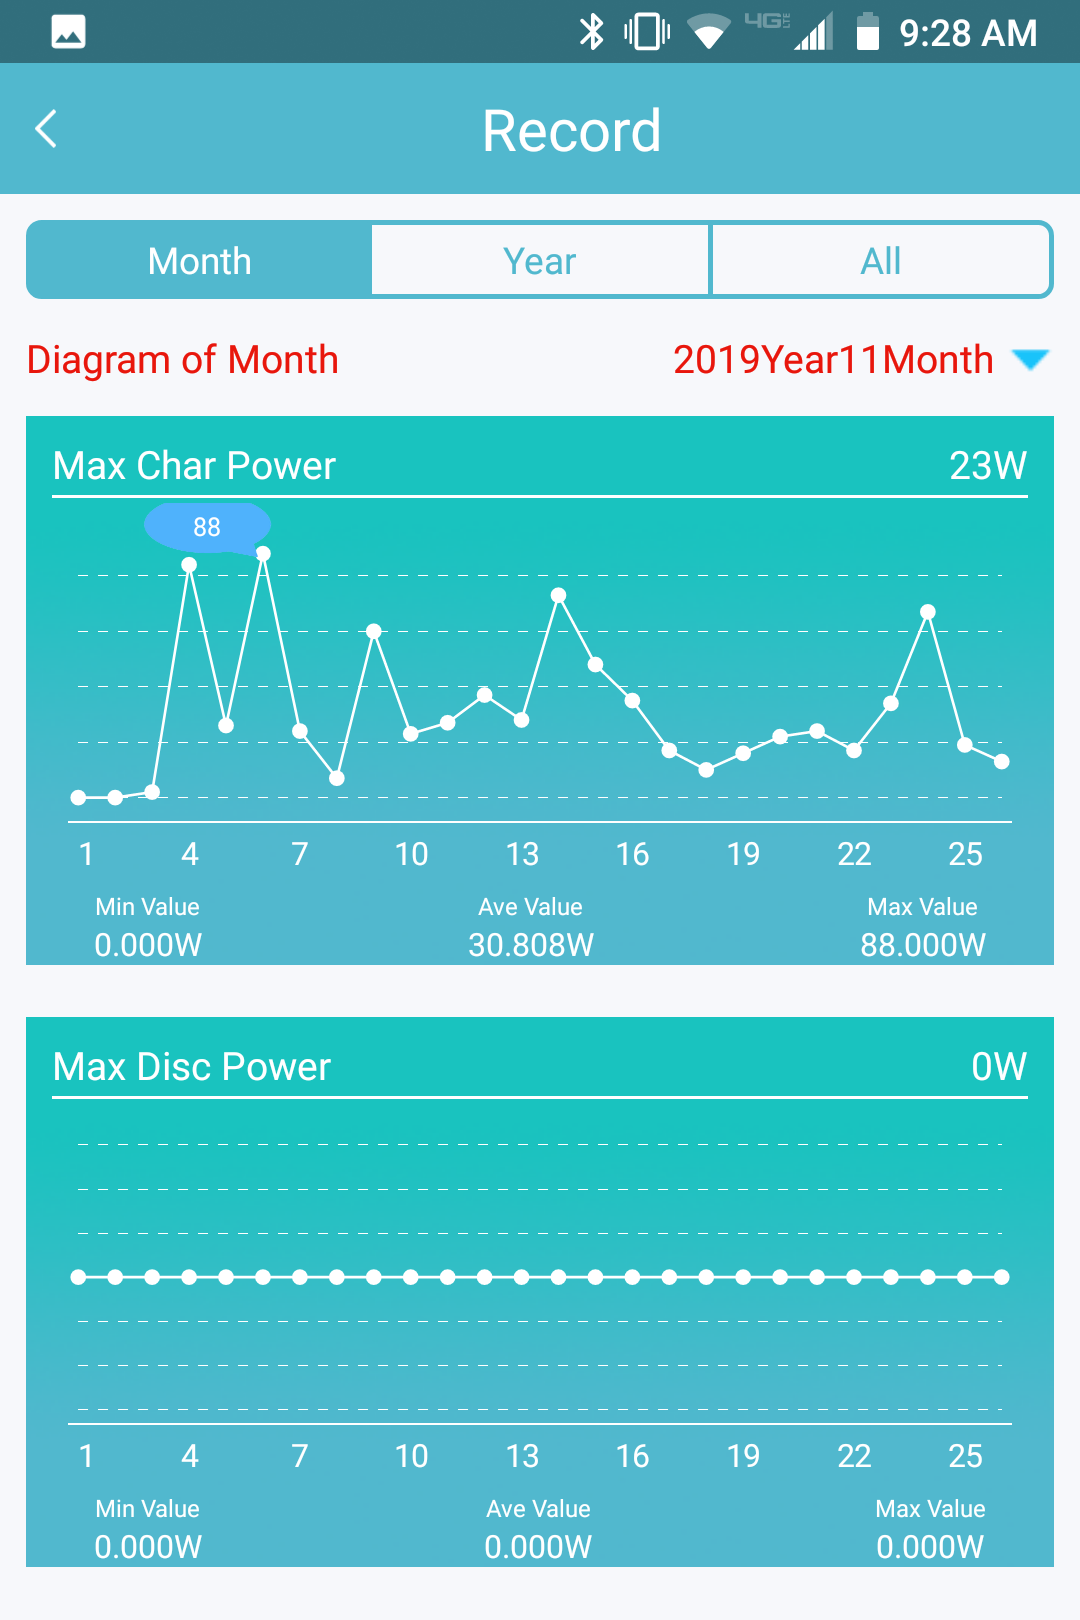
Finally, the solar system from Renogy is pretty cool. Two, 100 watt panels on the roof dump into a charge controller, which has Bluetooth control and monitoring on a phone app. The solar charger normally charges just the house battery, but can be switched over to charge both the house and vehicle batteries from the driver’s seat. The batteries can also be ganged together to start the vehicle if the main starting battery is low. The app looks at battery health and also displays charging history, which is highly dependent on how sunny the day is plus how much juice the battery needs. It can be a bright day but they controller might only output 5 watts to keep the battery in float charge. If battery usage suddenly increases (say I turn on a vent fan), the controller recognizes this and increases the charge power. These sort of features are critical when maintaining battery health. I’ll soon be upgrading the battery capacity, so stay tuned for an upcoming post on that!
I know this article was a bit longer and more technical, but I hope you at least see what kind of wide scope is involved in a project like this!
– James